DIY Bin Cage Guide: Build a Safe, Spacious Home for Your Mice
Are you searching for a mouse habitat that’s both affordable and roomy enough for their playful antics? As someone who has crafted countless bin cages for my own mice over the years, I understand the struggle to find a setup that balances safety, space, and simplicity-this guide delivers a clear, easy-to-follow solution that works.
You’ll get a full walkthrough covering how to choose the right materials for durability and ventilation, precise steps to assemble the cage without sharp edges, and ways to customize the interior for climbing and nesting fun.
Why Choose a Storage Bin Habitat Over Traditional Wire Cages?
Many new mouse owners start with a wire cage, thinking it’s the standard. I found that standard wire cages often fall short of providing the continuous, unbroken floor space that mice truly crave for running and foraging. A storage bin transforms into a fantastic habitat because it prioritizes your pets’ core needs in a way many commercial cages simply do not.
Space Requirements for Happy Mice
Mice are not climbers like rats; they are sprinters and burrowers. Their world is largely horizontal. A single mouse needs a minimum of 20 gallons of unbroken floor space, but I always aim for 30 gallons or more to allow for a rich, dynamic environment. This space lets you create distinct areas for nesting, playing, and eating, which dramatically reduces stress and encourages natural behaviors.
- Horizontal running paths for their high-energy sprints.
- Deep substrate layers for tunneling and burrowing.
- Room for multiple hideouts and enrichment items without feeling cramped.
My mouse, Kenny, is a perfect example of this need. In his previous wire cage, he seemed restless, constantly circling the perimeter. Since moving to his spacious bin, he spends his time creating elaborate tunnel systems instead of pacing, a clear sign of a more content and engaged mouse.
Ventilation Needs You Can’t Ignore
This is the most common concern I hear about bin cages, and it’s a valid one. Mice are very sensitive to ammonia buildup from their urine. Proper ventilation is not about having a few holes; it’s about creating a cross-flow of air that whisks away stale, humid air and brings in fresh oxygen. A wire cage often has too much ventilation, creating drafts, while a poorly modified bin has too little. Glass tanks and aquariums are the other extreme — their solid sides trap humid air and ammonia unless fitted with secure, well-ventilated tops. Below are a few practical ventilation tips for glass enclosures and modified bins.
- Ammonia is heavier than air and sinks, so low ventilation traps it right where your mice sleep and breathe.
- Good ventilation prevents respiratory infections, one of the most common health issues in pet mice.
- The goal is to balance humidity control with the absence of direct drafts on their sleeping area.
By cutting large, well-placed mesh panels in the bin’s lid and upper walls, you can achieve air circulation that is actually superior to many wire cages, which often have solid plastic bases that hold in moisture. My older mouse, Gregory, who is more sensitive to temperature changes, thrives in the stable, draft-free yet fresh atmosphere of his bin.
What Materials and Tools Do You Need for Your Bin Cage Build?
Gathering your supplies before you start is the key to a smooth and successful project. Having everything on hand turns what could be a frustrating afternoon into a fun and rewarding crafting session. You do not need expensive or specialized tools for this.
Choosing the Right Storage Bin
Not all bins are created equal. Walk down the storage aisle at your local store, and you’ll see a dizzying array of options. Your primary goal is to find a bin with the largest possible footprint, not necessarily the tallest one. Height is useful, but floor space is king for mouse happiness.
- Look for clear, smooth sides. Opaque bins can make your mice feel insecure and make it harder for you to observe their adorable antics.
- Ensure the lid is completely flat. Domed or irregular lids make attaching a secure mesh panel much more difficult.
- Check that the plastic is sturdy but not brittle. You should be able to cut it without it cracking.
- Run your hand along the interior seams. Smooth, rounded corners are easier to clean than sharp, hard-to-reach ones.
I made the mistake once of choosing a bin with textured sides, and it was a nightmare to keep clean and see into clearly-a lesson learned the hard way!
Hardware Cloth vs Other Mesh Options
The mesh you choose for ventilation is the most critical safety component of your entire build. It must be strong enough to resist chewing and have openings small enough to prevent escapes. I strongly recommend and exclusively use 1/4-inch galvanized hardware cloth (also called wire mesh) for all my bin cage builds. It is the gold standard for a reason.
Let’s compare your options:
| Material | Pros | Cons |
|---|---|---|
| 1/4″ Hardware Cloth | Extremely durable and chew-proof; perfect spacing to prevent escapes; allows for excellent airflow. | Stiffer and can be sharp; requires sturdy tools to cut. |
| Window Screen Mesh | Easy to cut and handle; very affordable. | Not chew-proof at all; mice can shred it and escape in minutes; provides less airflow. |
| Chicken Wire | Inexpensive and readily available. | Spacing is almost always too wide, allowing mice to squeeze through; not very sturdy. |
While hardware cloth requires a bit more effort to work with, the peace of mind knowing that my curious and impulsive mouse, Kenny, cannot chew his way to freedom is absolutely worth it. For small, anxious mice like my Jeffery, the security of a strong, impenetrable lid helps them feel safe in their home.
Step-by-Step Tutorial: Building Your Mouse Bin Cage

Step 1: Planning Your Ventilation Cutouts
Proper airflow is the foundation of a healthy mouse home. Mice produce a surprising amount of moisture from their breath and urine, and stagnant air can quickly lead to respiratory problems. I always plan for ventilation to cover at least one entire square foot of the bin’s surface area, divided between the lid and the upper sides. Use a permanent marker to draw your planned openings on the outside of the bin, ensuring they are well away from the corners where the plastic is structurally weaker.
- Lid Ventilation: Mark a large rectangle on the lid, leaving a 2-inch border around the edge for stability.
- Side Ventilation: On at least two opposite sides of the bin, draw long, narrow rectangles near the top.
- Tool Check: Ensure you have your marker, measuring tape, and a straight-edge ruler ready.
Step 2: Cutting the Lid Openings Safely
This step requires patience more than brute force. Rushing can cause the plastic to crack in unpredictable ways. Secure the lid on a stable, flat surface, like a workbench or a pair of sawhorses, so it cannot move while you cut. I start by using a sharp utility knife to score along the marked lines deeply. For thicker bins, a rotary tool with a cutting wheel makes the job smoother and gives you more control over the final shape.
- Score your marked lines repeatedly with a utility knife.
- Apply gentle, consistent pressure until the blade cuts through.
- For complex shapes, use a drill to create starter holes for a jigsaw blade.
- Remove the cut-out plastic piece carefully.
Step 3: Adding Ventilation Panels to Bin Sides
Side vents are crucial for creating a cross-breeze that carries ammonia and moisture up and out of the habitat. Cutting the side panels follows the same careful process as the lid, but the curved surface can be trickier. I find it helpful to support the inside of the bin wall with a scrap piece of wood while cutting to prevent flexing and cracking. Always cut from the outside in, and keep your free hand well away from the blade’s path.
Step 4: Attaching Hardware Cloth Securely
This is your primary defense against clever escape artists. I only use 1/4-inch galvanized hardware cloth, as anything wider is an invitation for a mouse to squeeze through. You must secure the mesh with more than just zip ties; a determined mouse will chew through plastic in a single night. My foolproof method involves using fender washers and machine screws or nuts and bolts for an absolutely escape-proof hold.
- Cut your hardware cloth to size, allowing for a 1-inch overlap on all sides.
- Position the mesh over the opening from the outside.
- Drill pilot holes through the plastic bin and the mesh.
- Secure with machine screws and fender washers on the inside, or bolts with nuts.
- Double-check that no sharp wire ends are poking into the cage interior.
Step 5: Creating a Secure, Escape-Proof Closure
A flimsy lid is the most common point of failure in a DIY bin cage. Your mice will test its integrity daily. I reinforce the lid’s attachment points with sturdy metal hardware, like suitcase clips or tamper-proof latches, installed at all four corners. For an extra layer of security, especially with larger bins, I sometimes add a central latch as well. The goal is a fit so tight and secure that you can lift the entire bin by the lid without it coming loose. These reinforcement techniques are covered in the Ultimate DIY Guide, which walks through the best hardware choices and step-by-step installation so your build is truly escape-proof.
Step 6: Smoothing Sharp Edges and Safety Check
Run your hands slowly over every interior surface you’ve modified. Any rough or sharp edge you find is a potential site for injury, causing painful bumblefoot or deep cuts. I use a metal file for large burrs on the plastic and sandpaper to smooth the cut edges of the hardware cloth. This final inspection is non-negotiable. Look, feel, and ensure the entire environment is safe for delicate feet and curious noses.
Customization Ideas for Your Mouse Enclosure
Adding Multiple Levels and Platforms
Mice are natural climbers and adore vertical space. Creating multiple levels not only maximizes their living area but also provides mental stimulation as they navigate their personal high-rise. I use natural, untreated branches of varying thicknesses secured with screws to create climbing structures. Check a guide to safe woods and branches for mouse cages to make sure the species you choose are non-toxic and free of pesticides or resins. Always clean and dry any foraged wood before installing it and make sure it’s firmly secured to prevent wobbling. You can also build platforms from untreated wood or sturdy plastic, connecting them with ropes or more branches to encourage acrobatics.
- Use tension rods to create easily removable floors.
- Drill holes in wood platforms and secure them with bolts and nuts.
- Incorporate ropes and ladders for adventurous climbing paths.
Installing Wheels and Exercise Equipment
A proper exercise wheel is a cage essential, not a luxury. Choose a solid-surface wheel that is at least 8 inches in diameter to prevent spinal curvature as your mouse runs. I mount wheels directly to the bin wall using a bolt, two large washers, and a lock nut, ensuring there is no wobble and a smooth, quiet spin. Avoid anything with crossbars or a mesh surface, as these can trap and injure tiny toes and tails. For a complete checklist, sizing guidelines, and model recommendations, see the definitive guide to safe mouse exercise wheels. It covers mounting tips and maintenance to keep your mouse running safely and comfortably.
Creating Access Doors for Easy Interaction
A large lid is great for deep cleans, but smaller access doors make daily spot-cleaning and interaction much less disruptive. I cut a square opening in the front or side of the bin and create a hinged door from the scrap plastic or a piece of acrylic. Secure it with sturdy cabinet hinges and a small latch. My mouse, Kenny, quickly learned that the soft click of the door latch meant treat time was near, making taming sessions much easier.
Setting Up Your Completed Bin Cage Habitat
Choosing Safe Bedding Materials
The right bedding supports your mice’s most fundamental natural behavior: burrowing. I provide a deep layer of bedding, at least 4-6 inches deep, to allow for the creation of complex tunnel systems. Burrowing satisfies instinctive needs and provides important mental stimulation. It also helps with temperature regulation and makes mice feel secure. Aspen wood shavings are my top choice; they are absorbent, affordable, and hold tunnels well. Avoid cedar and pine, as the aromatic oils can cause severe respiratory distress. Paper-based beddings are also a safe and soft option.
Essential Enrichment and Accessories
A bare cage is a bored cage, and bored mice can develop negative behaviors. Fill the space with items that encourage foraging, hiding, and playing to keep their minds active and bodies healthy. I use a rotation of cardboard tubes, tissue boxes, and ceramic hides. Foraging toys, where you hide their daily seed mix inside a puzzle, are a fantastic way to mimic natural food-seeking behavior.
- Multiple hiding places: ceramic huts, coconut shells, cardboard boxes.
- Chew toys: Whimzees dog chews, untreated wooden blocks.
- Foraging opportunities: scatter feed or use puzzle feeders.
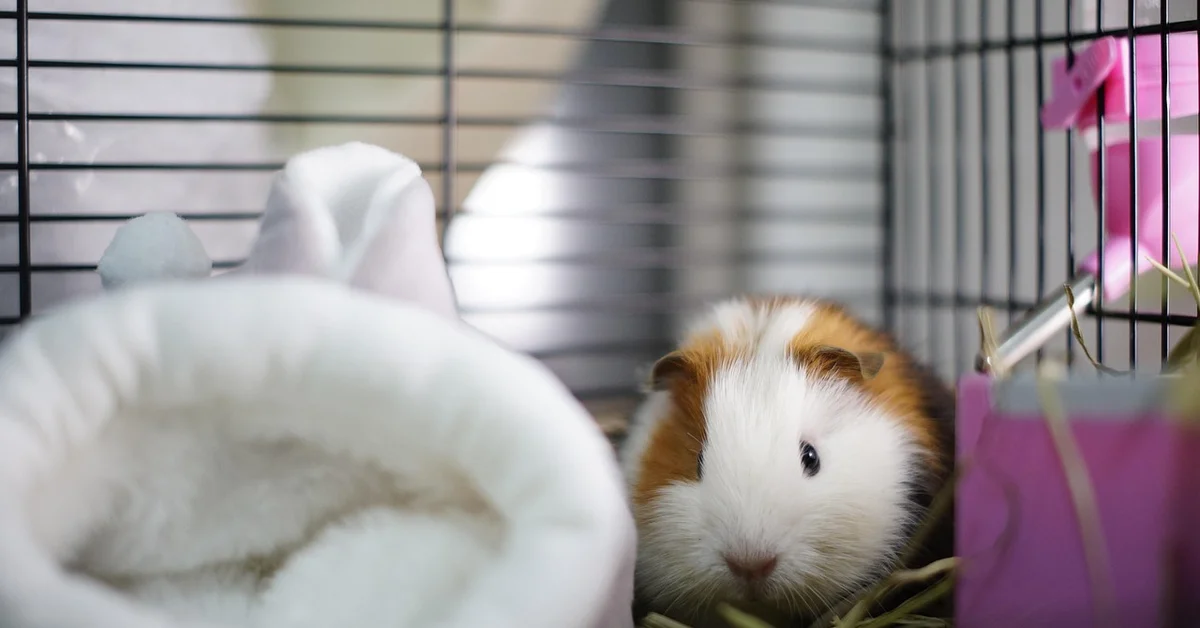
Water Bottles vs Bowls in Bin Cages
I strongly recommend using a glass or stainless-steel water bottle with a metal spout. Water bottles keep the water clean and free from bedding, food, and droppings, which is vital for preventing illness. Attach it securely to the side of the bin with a sturdy holder. While bowls seem more natural, they are easily soiled, spilled, and can become a drowning risk for very small or young mice like my Jeffery, who is a bit clumsy.
Maintenance and Cleaning Your Storage Bin Habitat
Daily and Weekly Cleaning Routines
Keeping your mice’s home fresh doesn’t need to be a chore if you stick to a simple schedule. A quick daily spot-check takes just minutes and prevents bigger messes later. Every morning, I glance inside to remove any visibly soiled bedding, uneaten food, or damp spots, which helps keep odors at bay and reduces stress for sensitive mice like Jeffery.
- Daily: Scoop out wet bedding, refresh water, and wipe food dishes.
- Weekly: Replace about one-third of the bedding, scrub wheels and hides with warm water, and rearrange toys for mental stimulation.
This routine mimics natural burrowing changes and keeps your mice engaged without overwhelming them.
Deep Cleaning and Sanitizing Methods
A thorough clean every four to six weeks ensures a healthy environment, especially for older mice like Gregory who appreciate consistency. Always use a vinegar-water solution for sanitizing, as harsh chemicals can harm delicate respiratory systems. Move your mice to a temporary safe space, empty the entire bin, and scrub all surfaces with the solution before rinsing thoroughly and air-drying completely. Proper cleaning techniques help prevent disease transmission between mice.
- Remove all items and bedding from the bin.
- Scrub with a 1:1 vinegar and water mix using a soft cloth.
- Rinse with clean water and dry in the sun if possible to kill bacteria naturally.
This method has kept my bins odor-free and safe through many cycles.
When to Replace or Upgrade Components
Watch for subtle signs that parts of your setup need attention to avoid emergencies. Chewed edges on plastic or persistent wear mean it’s time for a swap to prevent escapes or injuries. If you notice your mice, like Kenny, constantly testing weak spots, upgrade to thicker bins or add reinforcement. Bedding that clumps poorly or accessories with sharp edges should be replaced immediately for comfort and safety.
- Replace bedding if it stays damp or loses fluffiness.
- Upgrade wheels or hides if they show cracks or excessive chewing marks.
- Consider a larger bin if your mice seem cramped or less active.
Troubleshooting Common Bin Cage Issues
Preventing and Fixing Condensation Problems
Condensation can turn a cozy home into a damp hazard, but simple adjustments make a big difference. Adding extra ventilation holes near the top of the bin promotes air flow and reduces moisture buildup. I’ve found that placing the cage away from direct sunlight or drafts helps, and using highly absorbent bedding like aspen shavings pulls moisture away from the surface.
- Drill small holes in a grid pattern on the lid and upper sides.
- Check humidity levels with a cheap hygrometer and aim for 40-60%.
- If condensation appears, wipe it dry and increase ventilation immediately.
Stopping Determined Escape Artists
Some mice, like my bold Kenny, see every gap as an invitation to explore beyond their walls. Secure lids with sturdy clips or weights, and regularly inspect for new chew marks that could become exits. Mice chew a surprising range of materials — cardboard, soft plastics, foam, wood and even electrical insulation. Use chew-resistant options like metal mesh or thick hard plastics when reinforcing, and ensure all openings are smaller than a mouse’s head to block determined efforts.
- Use bungee cords or luggage straps to hold lids down firmly.
- Sand down any rough edges that mice might use as grip points.
- Provide plenty of enrichment inside to reduce boredom-driven escape attempts.
Managing Odor in Enclosed Spaces
A smelly cage often points to underlying issues with ventilation or cleaning habits. Focus on ammonia control by choosing bedding that neutralizes odors, like paper-based or hemp options. In my experience, a diet with less protein-heavy treats and more fresh veggies can also minimize strong smells, and adding a thin layer of baking soda under bedding absorbs odors without risk.
- Change bedding more frequently if odors persist after cleaning.
- Avoid overfeeding, which leads to waste buildup.
- Place the cage in a well-ventilated room but away from strong drafts.
Budget-Friendly Tips for Your DIY Build
Creating a wonderful habitat doesn’t have to drain your wallet—creativity is your best tool. Repurpose household items like cardboard tubes, untreated wood scraps, or old fabric for toys and hides that cost nothing. I often use dollar-store baskets as climbing structures or dig boxes, and bulk-buy bedding to save over time. These repurposed items also make excellent enrichment puzzle toys for mice—stuff cardboard tubes with treats, hide food in fabric pouches, or build simple foraging boxes to encourage exploring and problem-solving. For the best enrichment puzzle toys for mice, choose toys that promote foraging, chewing, and cognitive engagement. Always prioritize safety by avoiding materials with dyes or glues that could harm your mice.
- Use PVC pipes or yogurt containers as tunnels instead of pricey store-bought ones.
- Make your own foraging toys by hiding treats in crumpled paper or egg cartons.
- Shop sales for storage bins and compare prices online for the best deals.
Frequently Asked Questions
How do I make a DIY bin cage for a hamster?
To create a DIY bin cage for a hamster, start by selecting a large storage bin with a minimum capacity of 40 gallons for Syrian hamsters, as they need more horizontal space for burrowing and running than mice. Ensure the bin has a flat lid and smooth interior. Cut ventilation openings in the lid and upper sides, then securely attach 1/4-inch hardware cloth using bolts and washers to prevent chewing escapes, similar to a mouse cage but with emphasis on a larger wheel (10-12 inches) and deeper bedding for their natural behaviors.
While the basic steps mirror those for mice, hamsters may require additional reinforcement on the lid due to their strength and persistence. Always include enrichment like tunnels and hides, and avoid wire mesh wheels to prevent injury. Regularly check for wear and tear, as hamsters are adept at finding weak spots in their enclosure.
How do I make a DIY bin cage for rats?
Building a DIY bin cage for rats involves choosing a tall, spacious bin to accommodate their climbing and social nature, with a minimum of 20 gallons per rat. Focus on vertical space by adding multiple levels, ramps, and platforms made from safe materials like untreated wood or PVC pipes. Ventilation is critical, so cut large mesh panels on the lid and upper walls, using sturdy 1/4-inch hardware cloth secured with bolts to withstand their intelligence and chewing abilities.
Rats thrive in enriched environments, so include ropes, hammocks, and hiding spots to prevent boredom. Ensure the lid has strong latches or clips, as rats are skilled escape artists. For breeding setups, prioritize easy cleaning and separate areas if needed, but always house rats in pairs or groups to support their social well-being and reduce stress.
How can I make a DIY hamster bin cage without mesh?
To make a DIY hamster bin cage without mesh, rely on drilled holes for ventilation instead of large mesh panels. Use a drill with a small bit to create a grid pattern of holes across the lid and upper sides of the bin, ensuring they are too small for a hamster to squeeze through (less than 1/4 inch in diameter). This method reduces escape risks but requires careful monitoring of airflow to prevent humidity buildup, which can lead to respiratory issues.
Without mesh, choose a bin with a very secure, snap-on lid and consider adding extra holes if condensation occurs. Use highly absorbent bedding and avoid overfilling to maintain air quality. However, this approach is less ideal for long-term use, as it may not provide sufficient ventilation compared to mesh panels, so reserve it for temporary situations or if mesh is unavailable.
Your Path Forward
You now possess all the knowledge to build a safe, enriching, and budget-friendly home that your mice will adore. This project proves that with a little creativity and effort, you can provide an incredible habitat that perfectly suits their needs and your space. If you have other pets, take simple precautions: keep the enclosure secure, place it out of reach of larger animals, and never allow unsupervised contact. With these steps, your mice can thrive alongside your other pets.
The true reward comes from watching your curious companions explore their new custom territory, a home you built with your own two hands just for them. Enjoy this special part of the journey, and take pride in the wonderful environment you’ve created.
Further Reading & Sources
- How to make a bin cage
- r/PetMice on Reddit: Information on DIY-ing a Mouse Enclosure 🐭 DIY Mouse Cages 🐭
- Scales Tails Wings and Things, I made a bin cage!
Isabella is a passionate small pet enthusiast with over 8 years of experience in caring for mice. She loves sharing practical tips and heartfelt stories to help fellow mouse owners provide the best care for their tiny companions.
Cage Types