How to Safely Clean Up Mouse Droppings and Nests
Have you just discovered a collection of tiny, dark pellets or a messy nest of shredded materials in a quiet corner of your home? Finding these signs of uninvited rodent guests can be unsettling, and your first instinct might be to grab a broom and clean it up immediately.
This guide will walk you through the safest way to handle this situation, protecting both your health and your home. We will cover the health risks you need to be aware of, the protective gear you absolutely must use, and the correct step-by-step process for cleaning and disinfecting the area.
Why Pet Mouse Cleanup Requires Different Safety Measures Than Wild Mouse Cleanup
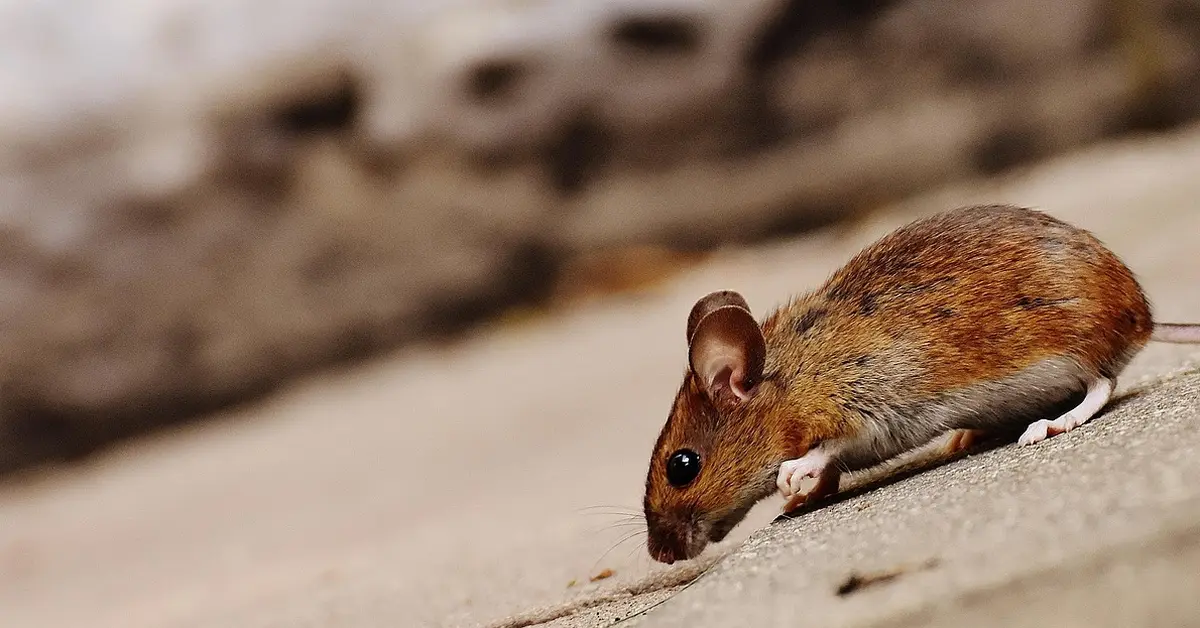
Cleaning up after your beloved pet mice is a world apart from dealing with wild rodent infestations. The fundamental difference lies in the controlled environment and health status of your pets. My mice, Kenny, Gregory, and Jeffery, live in a clean habitat with a consistent, healthy diet, drastically reducing the risk of them carrying the dangerous pathogens often associated with their wild cousins.
Wild rodents navigate through garbage, sewers, and other unsanitary areas, picking up bacteria and viruses like hantavirus and salmonella. Your pet mouse’s world is their cage, filled with bedding you provide and food you approve, creating a much safer microbiome. The goal with pet cleanup is maintenance and odor control, not hazardous material disposal. Regular cleaning, fresh bedding, and proper food storage reduce buildup of bacteria and parasites. These simple hygiene steps help prevent common ailments such as respiratory and digestive issues.
You can approach cage cleaning with confidence rather than fear. Routine cleaning is an act of care that strengthens your bond and ensures your mouse’s home is as cozy and healthy as possible. It’s about managing their waste before it becomes a problem, a proactive step in your overall care routine. Break care into daily, weekly, and monthly steps. Spot-clean every day, change bedding and clean toys weekly, and deep-clean and sanitize the cage monthly.
Essential Safety Equipment and Supplies You Need Before Starting
Gathering your tools beforehand makes the cleaning process smooth, efficient, and safe for both you and your pets. Having everything within arm’s reach means you won’t need to leave the cage unattended or handle soiled items multiple times.
Personal Protection Equipment for Routine Cage Cleaning
Even in a controlled environment, basic protection is a simple, smart habit. You are creating a barrier between yourself and waste products, which is just good hygiene.
- Disposable Gloves: A must-have for every cleaning session. Nitrile or latex gloves protect your hands from direct contact with droppings and urine.
- A Simple Face Mask: While not always necessary for a quick spot-clean, a basic dust mask is wise for a full cage breakdown. It prevents you from inhaling fine dust from bedding or dried waste.
- An Apron or Old Shirt: Keep your clothes clean from water splashes or accidental debris. I always wear an old hoodie dedicated to mouse care chores.
Pet-Safe Cleaning Agents and Disinfectants
Choosing the right cleaning solution is critical. Mice have incredibly sensitive respiratory systems, and harsh chemicals can cause serious health issues. Your number one priority is selecting cleaners that effectively remove grime without leaving harmful residues. Opt for non-toxic, fragrance-free cleaners and avoid ammonia, bleach, or strong aerosols that can irritate rodents’ lungs. Rinse surfaces thoroughly to remove residues that mice might later ingest.
- White Vinegar Solution: My absolute go-to. A mix of one part white vinegar to one part water in a spray bottle cuts through urine scale beautifully and is completely safe once dried.
- Specialized Small Animal Cage Cleaners: Look for brands that are explicitly labeled as safe for rodents, non-toxic, and free of harsh fumes. These are formulated to break down waste without endangering your pet.
- Hot, Soapy Water: For many cleanings, especially plastic bases and sturdy toys, a wash with dish soap and hot water is perfectly sufficient and very safe.
Avoid these common household cleaners at all costs: bleach (unless heavily diluted and thoroughly rinsed, which is often more trouble than it’s worth), ammonia-based products, phenolic compounds, and any aerosol sprays. Their potent fumes can linger and irritate your mouse’s delicate lungs long after you’ve finished cleaning. When deep cleaning a mouse cage, opt for pet-safe enzymatic cleaners or a diluted mild dish soap solution and rinse thoroughly. Let all items dry completely and air out the cage before putting your mice back in.
Step-by-Step Guide to Cleaning Your Pet Mouse Habitat
Step 1: Move Your Mice to a Safe Temporary Space
Before any cleaning begins, your first priority is relocating your mice to a secure area. I use a small, well-ventilated carrier with a familiar hideout and a few treats inside. Placing them in a separate room entirely prevents them from breathing in any cleaning fumes or dust from the process. My mouse Kenny, being so adventurous, would otherwise try to “help” by investigating every spray bottle and paper towel, so containment is key for their safety and your peace of mind. This also reduces the chance of spreading pathogens between cages or to yourself while you clean. Wash your hands and disinfect any tools or surfaces to further minimize disease transmission.
Step 2: Set Up Proper Ventilation and Gather Supplies
Open a window or turn on a fan to ensure a steady flow of fresh air. Ammonia from urine can build up quickly and irritate both your lungs and your mice’s sensitive respiratory systems. Good ventilation is a simple step that dramatically improves air quality for everyone involved. While the air clears, assemble your cleaning arsenal:
- Pet-safe disinfectant or a diluted vinegar solution
- Paper towels or clean rags
- A small dustpan and brush or a dedicated scoop
- A spray bottle filled with clean water
- Fresh bedding
- Sealable trash bags
Step 3: Spray Down Droppings and Soiled Bedding
Lightly mist the soiled bedding and any visible droppings with plain water from your spray bottle. Dampening the area first is critical because it keeps harmful dust and potential allergens from becoming airborne. You only want to make it moist, not soggy; a waterlogged habitat is difficult to dry completely and can encourage mold growth, which is another hazard you want to avoid.
Step 4: Remove Soiled Bedding and Nests Using Scooping Method
Use your scoop or dustpan to gently lift out the dampened, soiled bedding and nest material. Be especially careful around any established nests, as mice put a lot of effort into constructing them. I always try to leave the basic structure of a nest intact, only removing the truly soiled portions, to minimize stress when my mice return. For my thoughtful mouse Jeffery, disrupting his entire cozy home would cause him days of anxious rebuilding. A gentle, partial removal is much kinder.
Step 5: Disinfect All Cage Surfaces and Accessories
Once the old bedding is out, take everything else out of the cage-wheels, hides, water bottles, and toys. Spray all surfaces, including the empty cage base and bars, with your pet-safe disinfectant. Allow the disinfectant to sit for the time recommended on the label; this contact time is what actually kills germs. Then, scrub every nook and cranny with a rag or brush before giving everything a thorough rinse with clean water. Pay special attention to the wheel, which often collects a surprising amount of grime.
Step 6: Dry Everything Completely Before Adding Fresh Bedding
This might be the most overlooked step in the process. Use clean towels to wipe down the cage and all accessories until they are bone-dry. Any lingering moisture creates a damp environment where bacteria and mold can thrive, undoing all your hard work. If the weather permits, I sometimes let the plastic parts air-dry in the sun, which provides a little extra natural sanitizing power, especially after using pet-safe disinfectants for cages.
Step 7: Replace With Clean Bedding and Return Your Mice
Pour in a generous layer of fresh, comfortable bedding. Fluff it up and rearrange the clean accessories and hides, perhaps in a slightly new configuration to provide some mental stimulation. Returning your mice to a pristine, familiar-smelling home is one of the most satisfying parts of pet ownership. I always watch as Gregory methodically inspects every corner before settling in with a contented sigh, his domain restored to order.
Proper Disposal Methods for Contaminated Bedding and Droppings
Double-Bagging and Sealed Disposal Process
Never just toss soiled bedding directly into your indoor trash can. The dust and odor can linger. I always place the waste into a small, sealable plastic bag, then place that bag inside my main outdoor trash bag. This double-bagging method contains any potential mess and odor completely. It’s a simple habit that keeps your living space fresher and prevents any curious pets from getting into the waste.
Cleaning Droppings From Carpets and Soft Surfaces
If droppings end up on your carpet or a fabric sofa during free-roam time, act carefully. Put on disposable gloves and pick up the droppings with a damp paper towel. For any residual stain or odor, a pet-safe enzymatic cleaner is your best friend, as it breaks down the organic matter at a molecular level. Avoid using a vacuum cleaner initially, as it can blast fine particles into the air. Only vacuum the area after it has been cleaned and is completely dry.
How to Maintain a Preventive Cleaning Schedule
Daily and Weekly Spot Cleaning Routines
A little daily upkeep prevents a massive monthly cleanup. Each morning, I do a quick “poo patrol,” using a small scoop to remove any obvious droppings from high-traffic areas like under the wheel or near the food dish. Spending just two minutes a day on spot cleaning drastically reduces overall odor and maintains a healthier environment. Once a week, I do a more thorough refresh, replacing about one-third of the bedding and giving the wheel a good scrub. This routine keeps the habitat consistently clean without being disruptive.
Monthly Deep Cleaning and Full Habitat Sanitization
This is the full process outlined in the steps above. I mark a day on my calendar each month for a complete habitat tear-down, disinfection, and bedding replacement. This is when I inspect all toys and accessories for damage and give the entire cage a top-to-bottom sanitization. Sticking to a predictable monthly schedule means the job never feels overwhelming, and my mice, even the grumpy ones, seem to appreciate the routine. Between those deep cleans, I perform a short weekly home health check on each mouse. I quickly look for changes in weight, coat condition, eyes, breathing, or behavior so I can spot problems early.
When to Be Extra Cautious: Signs Your Mouse May Be Ill
While routine cleaning is a normal part of pet ownership, a sudden change in your mouse’s droppings or nesting habits can be a red flag. Paying close attention to these subtle shifts is your first line of defense in catching potential health issues early. A healthy mouse produces firm, dark, oval-shaped droppings. Changes in grooming — like overgrooming, patchy or matted fur, or a generally unkempt appearance — can also indicate stress or illness. Watching both droppings and grooming gives a clearer picture of your mouse’s wellbeing.
You should be concerned and consider a vet visit if you observe any of the following in the cage:
- Diarrhea or very soft, misshapen droppings.
- A significant decrease in the number of droppings, which can signal a blockage or loss of appetite.
- Droppings that are unusually pale, greenish, or contain mucus.
- Blood in the urine or around the droppings.
- A nest that is suddenly abandoned or built in an exposed, unusual location.
Behavioral changes often accompany these physical signs. A mouse that is lethargic, hunched, has a ruffled coat, or is breathing heavily needs immediate attention. My mouse Gregory, for instance, is typically very steady, so when he once became withdrawn and stopped organizing his nest, I knew something was wrong.
Special Circumstances: Cleaning After Wild Mouse Intrusion Near Pet Mice
Discovering that a wild mouse has entered your home and potentially come near your pet’s habitat is a serious situation. The primary concern is disease transmission, as wild rodents can carry pathogens harmful to both pets and people. Your cleaning protocol must be swift and thorough to protect your furry family members. Consult our Wild Mice: Dangerous Zoonotic Diseases guide for details on the specific pathogens to watch for and practical prevention steps. It also outlines safe cleanup and pet-care actions to reduce transmission risk.
Identifying Wild Mouse Droppings vs Pet Mouse Droppings
Telling the difference can help you assess the level of risk. While similar, there are usually distinct variations.
- Pet Mouse Droppings: Typically uniform in size and shape (about ¼ inch long), dark brown to black, and firm. They are found concentrated in the cage or a designated potty area.
- Wild Mouse Droppings: Often more variable in size, can be pointed or spindle-shaped at the ends, and may appear softer or lighter in color. You will find them scattered along walls, in cabinets, or in dark, secluded areas of your home, far from the pet cage.
Enhanced Safety Protocols for Wild Mouse Contamination
If you suspect wild mouse activity, your standard cleaning routine is not enough. You must treat the entire area as potentially hazardous and take extreme precautions when handling mouse droppings.
- Isolate Your Pets: Immediately move your pet mice and their entire cage to a completely separate, sealed room while you clean. This prevents them from inhaling any disturbed dust or pathogens.
- Use Maximum Protection: Don a full set of disposable gloves, an N95 respirator mask, and safety goggles. Open windows for ventilation if possible.
- Saturate and Seal: Do not sweep or vacuum dry droppings. Thoroughly spray the area with a bleach solution (1 part bleach to 10 parts water) or a commercial disinfectant labeled for rodent cleanup. Let it soak for at least 5 minutes.
- Dispose with Care: Wipe up all materials with paper towels, place everything-gloves, towels, nesting material-into a sealed plastic bag, and dispose of it in an outdoor trash bin.
- Deep Clean Surfaces: Wipe down all nearby surfaces, including walls and baseboards, with the disinfectant. Consider steam cleaning carpets if contamination occurred there.
Common Cleanup Mistakes to Avoid
Even with the best intentions, it’s easy to make errors that can undermine your efforts or even create new risks. Being aware of these common pitfalls will make your cleaning routine safer and more effective for everyone involved.
- Dry Sweeping or Vacuuming: This is the biggest mistake. It kicks up dust and aerosolizes potentially harmful particles from droppings, which you and your mice can then inhale. Always wet-clean.
- Using Harsh Chemical Sprays Directly in the Cage: Strong fumes from cleaners like ammonia or pine-scented products are toxic to a mouse’s sensitive respiratory system. Always remove your pets and rinse thoroughly.
- Incomplete Rinsing: After disinfecting a cage or accessories, any residual cleaner can irritate your mouse’s paws or be ingested during grooming. A thorough rinse with clean water is non-negotiable.
- Reusing Contaminated Bedding: Spot-cleaning is great, but trying to salvage obviously soiled or damp bedding is a recipe for ammonia buildup and respiratory infections. When in doubt, throw it out.
- Skipping Handwashing: It seems simple, but always wash your hands thoroughly with soap and water after handling soiled bedding or cleaning the cage, even if you wore gloves.
Frequently Asked Questions
Should I hire a professional service to clean up after my pet mice?
For routine pet mouse habitat cleaning, it’s generally unnecessary to hire a professional service, as the process is manageable with basic supplies and precautions outlined in our guide. However, if you have mobility issues, are immunocompromised, or face an extreme situation like a large-scale mess from an escaped mouse in a hard-to-reach area, a service specializing in small animal care could provide assistance. Always ensure any service you hire uses pet-safe, non-toxic cleaning methods to protect your mice’s sensitive respiratory systems.
How do I safely clean mouse droppings from a shed?
Cleaning droppings from a shed requires similar safety measures as indoor cleaning but with extra attention to ventilation and debris. Start by opening the shed doors widely for airflow, wear disposable gloves and a mask, lightly mist any droppings or nests with water to suppress dust, and carefully scoop them into a sealed bag for disposal. Since sheds can harbor wild rodents, disinfect surfaces with a pet-safe cleaner or diluted vinegar solution, and ensure the area is completely dry before storing any items to prevent mold or future infestations.
What is the safe way to clean mouse droppings from my car?
To clean droppings from your car, begin by ventilating the interior by opening all doors, and wear gloves and a mask to avoid direct contact or inhaling particles. Use a damp paper towel to pick up droppings, then apply a pet-safe disinfectant or upholstery cleaner to the area, scrubbing gently if needed, and wipe clean with water to remove residue. Avoid vacuuming initially to prevent dust from spreading; only use a vacuum with a HEPA filter after the area is dry, and consider steam cleaning for fabrics to ensure thorough sanitation without harsh chemicals.
Your Path Forward
By consistently using gloves and good ventilation, you transform a necessary chore into a simple, safe routine. This protects both your health and the well-being of your curious companions, allowing you to focus on the joy they bring.
This mindful approach to habitat maintenance is a fundamental part of responsible mouse guardianship, strengthening the bond you share with your tiny friends. A clean home is a healthy home, paving the way for many more happy moments of watching them explore and play.
Further Reading & Sources
- How to Clean Up After Rodents | Healthy Pets, Healthy People | CDC
- How to Clean Up After Rat or Mouse Infestation | Orkin
- P R E V E N T I N G H A N T A V I R U S I N F E C T I O N
Isabella is a passionate small pet enthusiast with over 8 years of experience in caring for mice. She loves sharing practical tips and heartfelt stories to help fellow mouse owners provide the best care for their tiny companions.
Household Hazards