Syringe Feeding and Hydration: Essential Supportive Care for Your Mouse
Have you ever watched your mouse push away its favorite treat, feeling a knot of helplessness tighten in your chest? I’ve been there with my own mice, and this guide will walk you through syringe feeding and hydration with gentle, reliable methods that restore health and hope.
We’ll dive into preparing easy-to-swallow formulas, handling syringes safely, and recognizing signs of improvement. You’ll gain the confidence to offer life-sustaining care, turning worry into actionable support for your furry friend.
When Does Your Mouse Need Assisted Feeding and Hydration?
Watching a mouse decline is a heart-wrenching experience. Knowing when to step in with supportive care can be the difference between a temporary setback and a tragic outcome. This intervention becomes necessary when illness, injury, or old age prevents them from consuming enough on their own to sustain their incredibly fast metabolism.
Recognizing Dehydration in Your Mouse
Dehydration can escalate frighteningly fast in such a small creature. I’ve learned to watch for subtle shifts that signal trouble. The most reliable test is the ‘skin tenting’ check: gently pinch the skin over their shoulders; if it doesn’t snap back immediately, they need fluids. A reliable, leak-proof water bottle helps ensure they always have access to fresh water without wet bedding or wasted liquid. Here are the best small animal water bottles that don’t leak.
- Sunken, dull-looking eyes that lack their usual bright, shiny appearance.
- Lethargy and unusual stillness, often tucked in a corner instead of exploring.
- Loss of skin elasticity, where the skin appears tight over the body.
- Little to no urine in the cage, or urine that is dark yellow and strong-smelling.
- A sticky, thick consistency to their saliva if you can see it.
Signs Your Mouse Has Stopped Eating Enough
A mouse that isn’t eating is a mouse in crisis. Their bodies burn energy so rapidly that even a day without sufficient food can be dangerous. I make it a habit to weigh my mice weekly; a sudden drop in weight is one of the clearest and earliest signs of a problem.
- Visible weight loss, making the spine and hip bones prominent.
- A distinct lack of new food crumbs or scatter in their usual eating spot.
- Food hoards that remain untouched for an unusually long time.
- General weakness, struggling to climb or hold food with their paws.
- Hunching over their food bowl but not actually consuming anything.
- Changes in stool, often smaller, drier, or fewer droppings.
Gathering Your Syringe Feeding Kit
Having a dedicated kit ready before an emergency arises saves precious time and reduces your stress. Preparing this simple kit in advance means you can focus entirely on your pet’s comfort when they need you most. I keep mine in a small, clean container right next to my mice’s habitat.
Essential Tools and Supplies
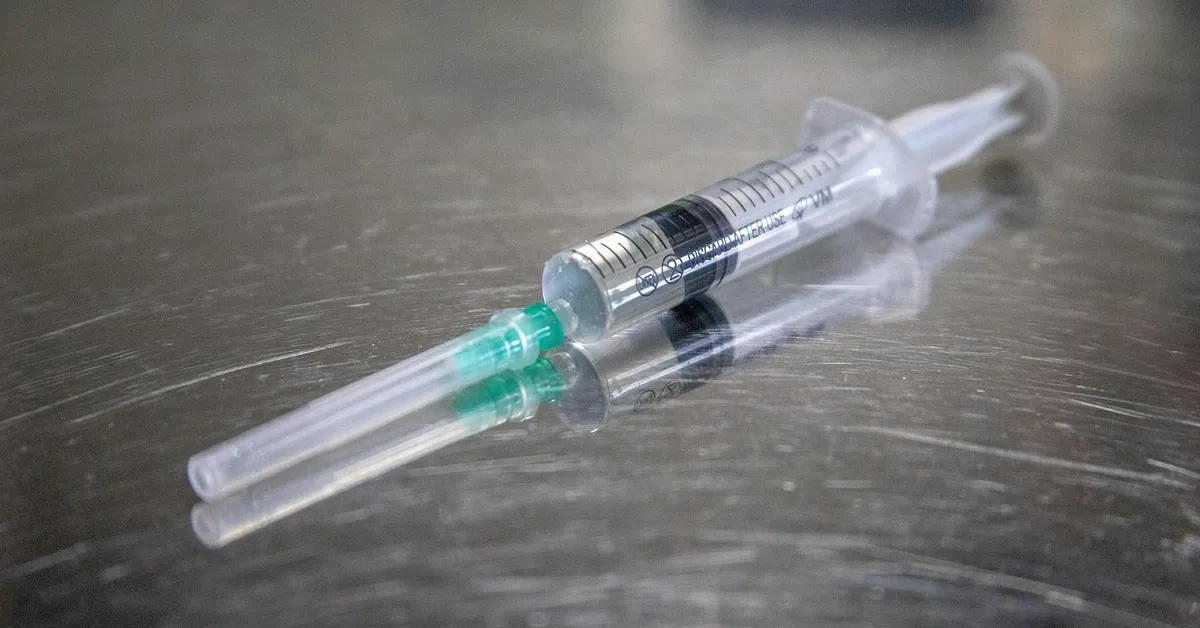
- Syringes: 1ml oral syringes without needles are perfect. They offer excellent control over tiny portions.
- Critical Care Formula: A powdered omnivore recovery food is the gold standard. It’s nutritionally complete.
- Flavor Enhancers: A small jar of pureed baby food (like chicken or banana) can encourage a reluctant mouse.
- Clean Water: For mixing formula and offering plain hydration.
- Small Dish and Spoon: For mixing the recovery formula to a smooth, pudding-like consistency.
- Soft Towel or Blanket: Creates a safe, non-slip surface for handling your mouse.
Choosing the Right Nutrition
Not all foods are suitable for syringe feeding. The goal is a high-calorie, easily digestible slurry. Oxbow’s Critical Care for Herbivores is my top choice, but for a more protein-focused option, I’ll blend soaked and mashed rodent block with a bit of sugar-free infant rice cereal. Avoid foods with large chunks, seeds, or high sugar content, as these can be difficult to syringe and are not ideal for a compromised digestive system.
Safety and Hygiene Tips
- Always use syringes with a soft, rubber plunger tip to ensure smooth delivery.
- Wash the syringe with warm, soapy water immediately after each use to prevent the formula from hardening inside.
- Check the tip of the syringe before each feeding to ensure it is smooth and free of nicks that could hurt your mouse’s mouth.
- Mix small, fresh batches of formula for each feeding session; do not store mixed formula for more than a few hours.
- Ensure your hands and all equipment are thoroughly cleaned before you begin.
What Should You Feed Your Sick Mouse?
When a mouse is unwell, their usual dry food mix becomes unappealing and difficult to eat. Your primary goal is to offer high-calorie, easy-to-swallow foods that provide both energy and comfort. I always keep a few specific items on hand for these delicate situations. Simple DIY mouse treats and healthy recipes you can make at home are ideal — soft, nutrient-dense options are easiest to swallow. Below are a few gentle homemade treats and tips for preparing them safely.
- High-Quality Baby Food: Opt for single-ingredient varieties like chicken, turkey, or squash. Ensure there are no added salts, onions, or garlic.
- Soaked and Mashed Pellets: Take their regular lab block pellets, soak them in warm water or unflavored Pedialyte, and mash them into a smooth, gruel-like consistency.
- Organic Soy Infant Formula: This is a fantastic, nutritionally complete option that is gentle on their system.
- Plain, Cooked Scrambled Egg: A fantastic source of protein that is soft and enticing.
- Critical Care Formula: This is a veterinarian-recommended powdered diet that you mix with water. It’s my gold standard for serious recovery.
I’ve found my mouse Kenny, who is usually so adventurous, becomes incredibly picky when he’s feeling poorly. Warming the food slightly to just above room temperature can make it far more aromatic and appealing to a reluctant eater. The smell seems to trigger their appetite when nothing else will.
What Fluids Work Best for Mouse Rehydration?
Dehydration can set in frighteningly fast with a small animal. Providing the right fluids is not just about water; it’s about replenishing what their body has lost. Plain, fresh water is your baseline, but for a mouse showing signs of weakness, you need something with more punch. Being able to recognize dehydration in small mammals is crucial. Watch for lethargy, sunken eyes, dry gums and reduced skin elasticity.
- Unflavored Pedialyte: This is my top choice. The electrolytes help their tiny bodies absorb the fluid more effectively than water alone. It must be unflavored and used within 24 hours of opening.
- Plain Water: Always available, but may not be sufficient if the mouse is already dehydrated.
- Diluted Apple Juice: A tiny amount of 100% apple juice mixed with water (about 1 part juice to 4 parts water) can sometimes encourage drinking due to its sweetness.
- Herbal Teas: Cooled, caffeine-free chamomile or fennel tea can be soothing for a distressed digestive system.
You can test for dehydration by gently pinching the skin at the scruff of their neck; if it doesn’t snap back immediately, they need fluids urgently. I keep a small bottle of unflavored Pedialyte in my mouse first-aid kit at all times for this exact reason. When checking mouse health at home, make this a regular part of your quick routine and also watch for changes in eating, weight, activity, or coat condition. If you notice anything concerning, contact your veterinarian promptly.
Step-by-Step: How to Syringe Feed Your Mouse
This process requires a gentle touch and a calm demeanor. Your anxiety can transfer to your mouse, so take a deep breath. You will need a 1ml oral syringe (without a needle), your prepared food gruel, and a soft towel.
- Prepare the Syringe: Draw up a small amount of the liquid food, ensuring there are no large lumps that could clog the tip.
- Calm Your Mouse: Gently wrap your mouse in a small, soft towel, leaving its head exposed. This creates a comforting burrito-like hold that prevents squirming.
- Position the Syringe: Approach from the side of the mouth, not the front. Gently slide the tip into the gap behind the front incisors.
- Administer Slowly: Depress the plunger in tiny, incremental amounts, allowing them to swallow between each push.
- Clean Up: Use a damp cotton swab to gently wipe any food from their face and fur afterward.
Proper Positioning to Prevent Aspiration
Aspiration, where food or liquid enters the lungs, is the greatest risk during syringe feeding. Never, ever syringe feed a mouse while it is lying on its back; this position makes aspiration almost inevitable. The correct posture is non-negotiable for safety.
- Always keep the mouse upright or at a slight forward angle, much like how they naturally sit to eat.
- Ensure their head is straight and not tilted back. The esophagus, the tube to the stomach, is behind the trachea (windpipe). A straight head helps guide food the right way.
- If you see bubbles at their nose or hear a gurgling sound, stop immediately. These are signs of aspiration. Hold them upright and allow them to clear their airway before attempting again with even smaller amounts.
My older mouse, Gregory, is very patient with this process, but I still take extreme care with his positioning. Patience and a perfectly upright mouse are your two best tools for preventing a medical emergency. I scoop him gently from underneath, supporting his hindquarters instead of grabbing his tail. Moving slowly and keeping him close to my body helps him feel secure while I pick him up and handle him.
How Much and How Often to Feed
Overfeeding can be as dangerous as underfeeding. A sick mouse has a slowed metabolism and a fragile digestive system. Think of it as providing many small, manageable meals rather than a few large ones. This mimics their natural grazing behavior and places less stress on their body.
- For a full meal replacement, aim for approximately 1ml of gruel per 25 grams of body weight, split over multiple feedings.
- A good starting schedule is to offer 0.2-0.5ml of food every 2-4 hours during the day.
- Do not wake a sleeping mouse to feed it unless your veterinarian has specifically instructed you to do so. Rest is also healing.
- Monitor their weight daily with a small gram scale. Stable or gaining weight is your goal. If they continue to lose weight, you must consult a veterinarian.
With my smallest, Jeffery, I found that even 0.3ml every three hours was enough to keep his energy up without overwhelming him. Watching their body condition and energy levels is more important than rigidly sticking to a chart. You are their best advocate.
Troubleshooting When Your Mouse Refuses the Syringe
What to Do If Your Mouse Won’t Swallow
It’s a heart-sinking moment when your mouse turns its head away or lets the food dribble out. First, remain calm and patient; your stress can make your mouse more resistant. I’ve found that a gentle, steady approach works far better than any amount of force. However, refusal to eat or avoiding handling can also be a sign of discomfort or pain. Here’s how to tell if your mouse is in pain.
Check your mouse’s position. A slightly upright posture, with the head tilted just a fraction upwards, often encourages swallowing. Proper positioning is often the simple fix that makes all the difference. If your mouse is lying flat, it’s much harder for them to coordinate the swallow reflex.
Sometimes the issue is the food itself. The mixture might be too thick, causing it to stick, or too thin, making it hard to control. Adjusting the consistency to a smooth, pudding-like texture can resolve many feeding refusals. A drop of a favorite flavor, like a tiny bit of banana or yogurt baby food, can also make it more appealing.
If your mouse is actively struggling, stop immediately. Forcing a stressed mouse can lead to aspiration, where food enters the lungs, creating a far more serious emergency. Take a five-minute break, offer a gentle petting session to rebuild trust, and then try again. With my mouse Jeffery, who gets anxious easily, these short breaks are non-negotiable for a successful feeding.
- Recheck positioning: Ensure your mouse is upright.
- Adjust food texture: Make it smoother or slightly thicker.
- Enhance flavor: Add a tiny amount of a palatable ingredient.
- Take a break: Never fight a struggling mouse.
- Check for pain: A vet visit may be needed if refusal persists.
Understanding Tube Feeding for Mice
Tube feeding is a more advanced technique where a soft, flexible tube is gently passed directly into the stomach. This method is typically used when a mouse is completely unable or unwilling to eat on its own, even from a syringe. It bypasses the mouth and throat entirely.
This is not a procedure to undertake lightly or without proper training. Tube feeding should only be performed by a veterinarian or an owner who has received direct, hands-on instruction from one. Incorrect placement can cause severe injury. I have only ever assisted my vet with this for a very sick mouse; it is not a standard home-care technique.
The primary benefit is delivering precise nutrition and hydration directly to where it’s needed most. For a critically ill mouse, tube feeding can be a literal lifesaver, providing energy for their body to fight illness. It ensures they get every single calorie you offer, with no waste or stress from oral refusal.
Emergency Stabilization Before the Vet Visit
When your mouse is in crisis and a vet appointment is hours away, your actions can stabilize them for the journey. Your immediate goal is to prevent further decline by managing two key factors: body temperature and blood sugar.
A cold mouse is a dying mouse. Their tiny bodies lose heat with terrifying speed. Create a gentle heat source by placing a heating pad on the lowest setting under half of their carrier or by filling a sock with uncooked rice and microwaving it for short bursts, wrapping it in a towel. This gives them the option to move away from the heat if they get too warm.
Hydration is more critical than food in the first few hours of an emergency. Offering small, frequent drops of plain water, unflavored pediatric electrolyte solution, or a critical care mix from a syringe can prevent dangerous dehydration. Even if they don’t swallow much, the moisture on their tongue and gums helps.
Keep their environment dark, quiet, and undisturbed. Minimizing stress conserves the precious energy they need to stay alive. Place a small, familiar hide or soft cloth with your scent in their carrier to provide comfort. I always keep a small “go-bag” with a syringe, critical care powder, and a portable heat source ready for these exact situations.
- Warmth: Provide a safe, indirect heat source immediately.
- Hydration: Attempt to offer fluids via syringe every 15-30 minutes.
- Calories: If they are alert enough, offer a highly diluted critical care mixture.
- Comfort: Reduce noise and light; provide a familiar-smelling item.
- Preparation: Have your vet’s address and phone number easily accessible.
Monitoring Your Mouse’s Progress
Watching for small, positive changes is the most rewarding part of supportive care. I look for a return of that familiar sparkle in their eyes and a renewed interest in their surroundings. Even a slight increase in grooming is a fantastic sign they are feeling better.
Keep a simple daily log to track these key indicators:
- Weight: Use a small kitchen scale to weigh your mouse at the same time each day. Consistent weight gain, even just a gram, is a major victory.
- Hydration: Gently pinch the skin on the back of their neck. Well-hydrated skin will snap back immediately, while dehydrated skin will remain tented.
- Activity Level: Note if they are moving around their enclosure more or attempting to use their wheel again.
- Output: Check for normal, formed droppings and a small amount of urine, which confirms their digestive system is working.
Progress is rarely a straight line upward. Some days my mouse Jeffrey will take his slurry eagerly, while other days he needs more coaxing, and that is perfectly normal. The overall trend over several days is what truly matters. If you see consistent improvement, you are on the right track.
Safety Risks and When Not to Syringe Feed
Syringe feeding is a powerful tool, but it must be used with great care to avoid causing harm. The single greatest risk is aspiration, where liquid enters the lungs instead of the stomach. This can lead to a serious and often fatal pneumonia.
You must stop syringe feeding immediately and contact a veterinarian if your mouse shows any of these signs:
- Struggling violently, coughing, choking, or gasping during feeding
- Liquid bubbling from the nose or mouth
- Wheezing or audible clicking sounds from the chest after a feeding
- Extreme lethargy or being completely unresponsive
Technique is everything for safety. Always offer the syringe from the side of the mouth, aiming it toward the back of the cheek, and never squirt liquid directly down the throat. Go painfully slow-a single drop at a time, allowing them to swallow. If your mouse is strong enough to resist firmly, it may be better to offer a highly palatable mash in a shallow dish instead of forcing the syringe.
Cleaning and Care Between Feedings
Hygiene is non-negotiable when a mouse’s immune system is compromised. A clean feeding environment prevents secondary infections and keeps your mouse comfortable. I have a dedicated “hospital kit” with everything I need, which makes the process smooth and less stressful for both of us. For at-home care, I set up a quiet hospital cage with soft bedding, easy access to food and water, and the kit within reach. This calm, organized setup helps minimize stress and makes monitoring and treatment easier.
Follow this routine after every single feeding session:
- Immediately disassemble the syringe and rinse all parts with warm water.
- Wash them thoroughly with a mild, unscented dish soap.
- Use a small bottle brush or pipe cleaner to scrub the inside of the syringe barrel.
- Rinse until all soap residue is gone and allow to air-dry completely on a clean paper towel.
Your mouse will likely get food on their fur, especially around their face and paws. Gently wipe their face and paws with a soft, damp cloth or a cotton ball moistened with warm water to prevent the food from matting their fur and irritating their skin. Check their bedding more frequently, as soiled areas can harbor bacteria. A clean mouse in a clean home recovers faster. When cleaning the cage, use a pet-safe disinfectant and wear gloves, and replace soiled bedding promptly. Regular, careful cleaning reduces the risk of disease transmission.
Frequently Asked Questions
Where can I find a supportive care syringe feeding video for mice?
Videos demonstrating syringe feeding techniques for mice can be found on reputable platforms like YouTube or through veterinary websites. These visual guides are helpful for seeing proper handling and slow administration, but always ensure the source is credible and the methods align with your veterinarian’s advice. Remember, videos should supplement, not replace, the personalized guidance from this article and a professional to avoid risks like aspiration.
What is supportive care syringe feeding with a tube, and is it safe for mice?
Tube feeding involves passing a soft, flexible tube directly into the stomach to deliver nutrition, and it is typically used when a mouse cannot eat orally due to severe illness or injury. This procedure should only be performed by a veterinarian or under their direct supervision, as incorrect placement can cause serious harm, such as perforation or aspiration. While it ensures precise nutrient delivery, it is not a standard home-care technique and requires professional training to execute safely.
Are there supportive care syringe feeding pumps available for mice?
Syringe feeding pumps are specialized devices that provide controlled, continuous delivery of fluids or liquid food, often used in veterinary settings for critically ill mice needing constant support. These pumps help maintain consistent hydration and nutrition with minimal stress, but they are generally reserved for severe cases under veterinary care due to the need for precise calibration and monitoring. For home use, manual syringe feeding with a 1ml oral syringe is recommended, as it allows for better control and interaction with your mouse.
Your Compassion in Action
Syringe feeding and hydration are not just medical procedures; they are profound acts of love that can truly sustain a fragile mouse through a difficult time. Mastering this gentle skill equips you to provide direct, life-sustaining support when your pet needs you most.
Through this attentive care, you build a unique bond of trust, showing your mouse they are safe and cherished even when they feel unwell. You have the power to make a significant difference in their recovery, turning a moment of vulnerability into one of deep connection and comfort.
Further Reading & Sources
- Orphaned Mouse Care | Chip Chloe Squirrel
- Orphaned Baby Mice – G.W. Deer Mouse Ranch
- r/PetMice on Reddit: Orphan mice
Isabella is a passionate small pet enthusiast with over 8 years of experience in caring for mice. She loves sharing practical tips and heartfelt stories to help fellow mouse owners provide the best care for their tiny companions.
Vet Visits