Free-Roam Time: How to Create a Mouse-Proof Playpen
Do you ever feel a pang of worry when your mice venture out for play, imagining them slipping into cracks or nibbling on hazards? I’ve been there too, watching my own mice like Kenny dart toward trouble, and I know how much you want to offer freedom without fear.
This guide gives you a clear path to a secure, engaging play space built from my years of experience. You will learn to choose materials that resist chewing and climbing. We will design a layout that keeps your mice safely inside. I’ll share simple ways to add toys and structures for mental stimulation.
Why Free-Roam Time Matters for Your Pet Mice
Physical Exercise Opportunities Beyond the Cage
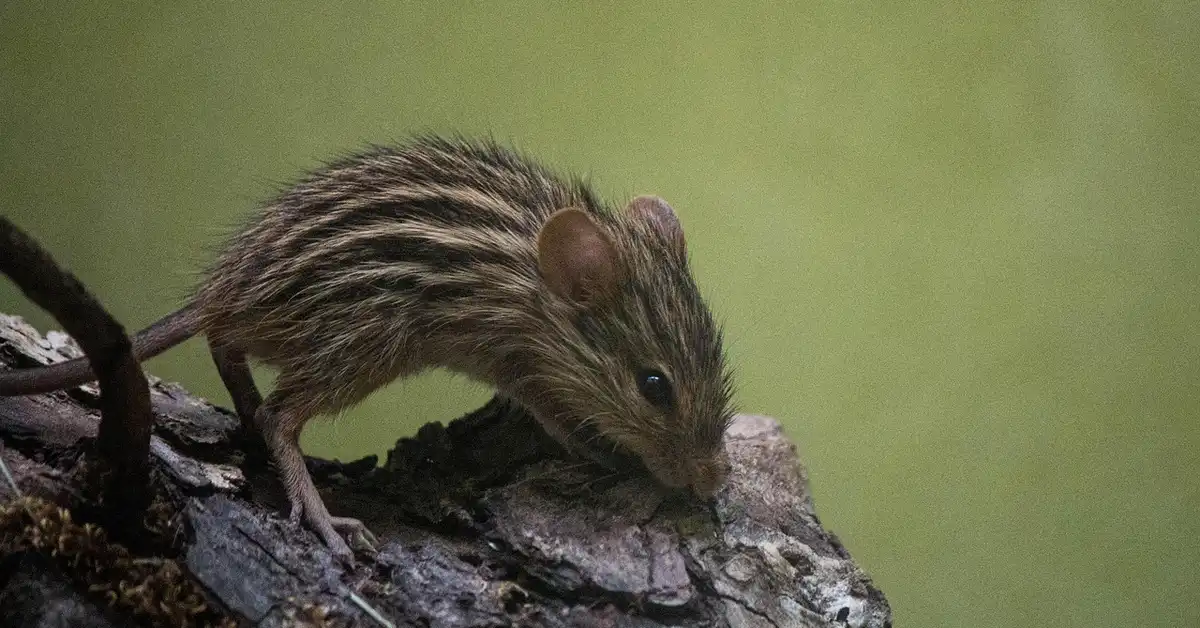
Even the most spacious cage can feel restrictive for a creature born to dart and explore. Providing a larger, varied space allows your mice to achieve the full, explosive sprints and agile climbs their bodies are designed for. In their cage, my mouse Kenny might run on his wheel, but in a playpen, he performs intricate parkour over bridges and tunnels, engaging entirely different muscle groups.
- Sprinting across open floors builds cardiovascular health far more than repetitive wheel running.
- Climbing up ramps or small, safe ropes develops shoulder and back strength.
- Burrowing into deep, clean paper bedding satisfies a deep instinct and provides a full-body workout.
- Jumping between stable platforms improves coordination and hind leg power.
Mental Stimulation and Natural Behaviors
A new environment is like a puzzle for a mouse’s brain, filled with novel scents, textures, and paths to decipher. This mental engagement is a powerful antidote to the lethargy and stereotypic behaviors that can develop in a predictable habitat. I’ve watched my thoughtful mouse, Jeffery, spend an entire play session meticulously investigating a single cardboard tube, his whiskers twitching with concentration.
- Foraging for treats hidden throughout the playpen mimics their natural scavenging instincts.
- Navigating a maze of obstacles provides crucial problem-solving challenges.
- Investigating new, mouse-safe items like untreated wicker balls or terracotta pots keeps their minds sharp and curious.
- This variety prevents habituation, where they become so bored with their surroundings they stop interacting with them.
What Makes a Playpen Truly Mouse-Proof?
Escape-Proof Design Requirements
The primary rule for any mouse enclosure is that there are no gaps, no matter how small they appear to you. A determined mouse can compress its skull and slip through an opening the size of a dime, making seamless construction non-negotiable. Vertical walls should be entirely smooth, as even the tiniest texture can become a toehold for an ambitious climber like Kenny. Making good use of vertical space—shelves, ramps, and elevated hideaways—lets you expand the usable area without increasing floor footprint or introducing escape points. Elevated platforms also satisfy climbing instincts while keeping enrichment safely contained.
- Walls must be a minimum of 12 inches high, with a secure lid for any known jumpers.
- All panel connections must be flush, with no triangular gaps in the corners.
- The entire structure should sit on a solid base or be placed on a floor with no nearby furniture they could use as a launchpad.
- Regularly inspect the entire perimeter from a mouse’s eye level, looking for any new gaps from wear and tear.
Chew-Resistant Materials That Actually Work
You must assume everything is a chew toy, because to a mouse, it is. Soft plastics and thin woods are mere suggestions to a mouse, easily reduced to splinters and shreds in minutes. I learned this the hard way with a plastic bin lid; Gregory, who is usually so calm, methodically chewed a hole through it as if it were a block of his favorite aged cheese.
- Hard, food-grade plastics like ABS or acrylic are far more resilient than standard storage bin plastic.
- Powder-coated metal mesh is excellent for ventilation but ensure the wire gauge is thick enough to resist bending.
- Smooth ceramic tiles or slabs make fantastic, indestructible floors for certain playpen sections.
- Always avoid untreated pine, cedar, and any materials with paints or chemical sealants.
Secure Latches and Connection Points
This is where most DIY playpens fail. A simple clip or a panel that just “snaps” together is an open invitation. Mice are intelligent and persistent, and they will test every single connection point for weakness repeatedly. I use small, spring-loaded bolt snaps meant for bird cages, as their mechanism is too complex for my mice to figure out.
- Use metal, locking carabiners or parrot cage clips on any doors or lid access points.
- For interlocking panel systems, reinforce the connections with zip ties on the outside.
- Regularly test the strength of all latches yourself by applying gentle pressure; if you can pop it open, so can they.
- Ensure any ventilation holes are too small for a mouse to get its teeth around the edge to start gnawing.
Setting Up Your Mouse-Proof Playpen: Complete Checklist
Choosing the Right Location and Playpen Size
Selecting the perfect spot for your mouse’s adventures is the first step toward a stress-free play session. I always set up in a quiet, low-traffic room where my mice, like the bold Kenny, won’t be startled by sudden footfalls or loud noises. Avoid areas with direct sunlight or drafts, as these can cause rapid temperature changes that are stressful for small pets. When placing the cage, I put it on a sturdy, elevated surface away from windows, vents, and busy doorways. This helps keep the habitat calm and at a consistent temperature for my mice.
- Opt for a corner of a bedroom or home office, away from televisions and busy hallways.
- Ensure the space is free from electrical cords, houseplants, and small items they could chew or swallow.
- Provide a minimum of 4 square feet of floor space for a small group to explore without conflict.
- Choose a location with a solid, non-carpeted floor for the easiest cleanup.
Floor Protection and Base Setup
Your flooring choice directly impacts safety and your sanity during cleanup. A solid, waterproof base is non-negotiable for protecting your floors from accidents and containing any mess. I use a large piece of corrugated plastic or a vinyl tablecloth placed under the entire playpen structure.
- Corrugated plastic sheets are rigid, chew-resistant, and easy to wipe clean.
- Vinyl floor protector rolls provide a soft, waterproof barrier and can be cut to any size.
- Layer the base with a simple paper-based bedding or fleece liners for comfort and absorbency.
- Always secure the edges of your base material to prevent curious mice from crawling underneath.
Childproofing and Petproofing Your Playpen Area
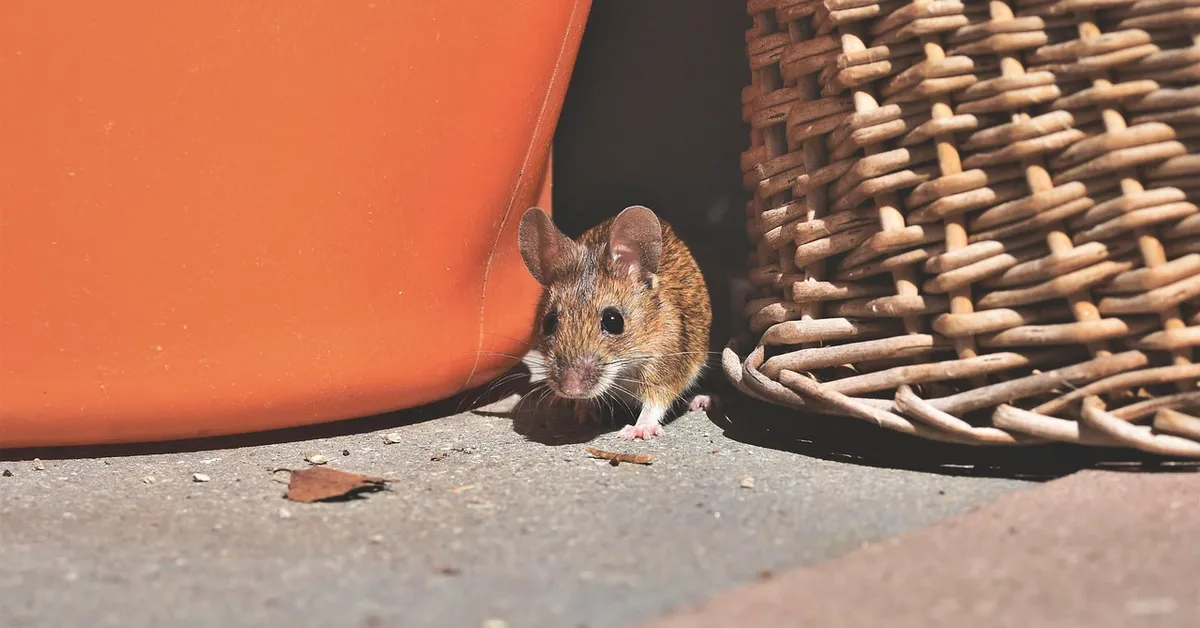
Mice are master escape artists and will find the smallest gap you never noticed. Before letting your mice out, get on your hands and knees and inspect the entire perimeter at their eye level. Look for holes in baseboards, gaps under doors, and spaces behind furniture. Also inspect attics, crawl spaces, vents, and gaps around pipes. Mice often nest in wall cavities, insulation, and cluttered storage areas.
- Use draft stoppers under doors to block potential escape routes.
- Move or block access to bookshelves, cabinets, and sofas they could climb inside.
- Ensure other pets like cats or dogs are securely in another room with the door closed.
- Remove any toxic substances, including cleaning supplies, pesticides, or certain types of wood.
DIY Mouse-Proof Playpen: Materials and Assembly
Materials and Tools You’ll Need
Building your own playpen is a rewarding project that lets you customize the space perfectly. You can create a fantastic, secure enclosure with just a few affordable items from a hardware or craft store. My favorite DIY setup uses large, interlocking plastic panels.
- Plastic canvas sheets or C&C grid panels (ensure spaces are no wider than 1/2 inch).
- Plastic cable ties or panel connectors for a sturdy structure.
- A utility knife or strong scissors for cutting materials.
- A measuring tape to ensure accurate dimensions.
- Binder clips or small carabiners for attaching a roof.
Building an Escape-Proof Structure
The key to a successful DIY playpen is creating seamless connections that leave no room for a Houdini act. Connect your panels from the inside of the structure so the smooth, outer surface offers no claw-holds for ambitious climbers. Double-check every joint by gently pushing on it.
- Lay out all your panels on your protected floor to visualize the final shape.
- Connect panels at the corners using multiple cable ties for maximum stability.
- Ensure the entire structure is tall enough-at least 12 inches high-to prevent leaping escapes.
- Run your hand along all the interior seams, feeling for any sharp edges from cable ties and trimming them flush.
Adding a Secure Cover or Roof
A roof is absolutely essential, especially for agile and curious mice. Even my calmest mouse, Gregory, has surprised me with a sudden vertical leap when something caught his interest on the other side of the pen. A cover provides peace of mind.
- Use a spare grid panel secured with binder clips as a simple, effective roof.
- For a lighter option, a window screen mesh can be stretched taut and clipped down.
- Ensure the cover is easy for you to remove quickly but impossible for your mice to dislodge.
- Never use a heavy lid that could fall and injure a mouse or trap a limb.
Store-Bought Options: What Works for Mice
Pet Playpen Features to Look For
If DIY isn’t your style, many commercial playpens can work with a critical eye. The single most important feature is bar spacing; it must be narrow enough to prevent a mouse from squeezing its skull through. A general rule is that if a mouse can get its head through, its body will follow.
- Seek out pens marketed for hamsters or rats, but always verify the bar spacing is 1/4 to 1/2 inch at most.
- Opt for pens with a solid plastic base at least 3-4 inches high to contain bedding.
- Look for tall, vertical sides without horizontal bars, which act as ladders for escape.
- Choose models with a top-closing door for easy, secure access.
Modifying Commercial Playpens for Mouse Safety
Most store-bought pens require a little tweaking to become truly mouse-proof. I often line the bottom third of a wire pen with clear plastic corrugated sheets to block climbing attempts and contain any kicked-out bedding. This simple modification makes many unsuitable pens perfectly functional.
- Use zip ties to securely attach plastic canvas or hardware cloth over any gaps that seem too wide.
- For pens with a wire mesh floor, cover it completely with a solid piece of cardboard or plastic.
- If the pen doesn’t include a roof, create one using the same methods as the DIY section.
- Regularly inspect all modifications for signs of chewing or loosening, especially after each use.
Enriching Your Mouse Playpen Space
Essential Toys and Tunnels for Exploration
Mice are natural explorers, and a playpen without engaging pathways is like an empty highway. Creating a network of tunnels and hideouts is the single most effective way to satisfy their instinct to investigate and feel secure. Mice have a natural instinct to dig and tunnel, which makes having a variety of pathways crucial in any playpen. I use a mix of store-bought rodent tunnels and simple DIY options like empty cardboard tubes from paper towel rolls.
- Paper towel and toilet paper tubes: Free, chewable, and easily replaceable.
- Cardboard maze boxes: Create multi-room structures by cutting doors between small boxes.
- Commercial plastic tunnels: Durable and often connectable for complex layouts.
- Willow balls and tunnels: Provide a safe, natural material for chewing and hiding.
- Digging boxes: Fill a shallow container with crinkled paper or coconut soil for burrowing.
My mouse Kenny will immediately dart into any new tunnel, while Jeffery prefers to watch from a distance before tentatively following. Rotating a few different tunnel types each session keeps the environment fresh and mentally stimulating for them.
Climbing Structures and Hiding Spots
Think vertically! Mice are surprisingly adept climbers and appreciate a space that lets them survey their kingdom from above. Providing multiple levels and secure hiding spots reduces competition and gives each mouse a place to call its own. I’ve found that a combination of stable and wobbly elements works best.
- Bird ladders and rope perches: Offer secure, textured climbing routes.
- Cork bark rounds and flats: Create natural-looking cliffs and caves.
- Small, sturdy branches from pet-safe trees (like applewood): Double as climbing frames and chew toys.
- Multiple hideouts: Include at least one hide per mouse, plus an extra to prevent squabbles. Small cardboard boxes, coconut huts, and ceramic hides are perfect.
- Hanging toys: Suspend millet sprays or chew toys from the playpen roof to encourage stretching and problem-solving.
Gregory, my older mouse, often claims the highest, most stable platform to calmly observe, embodying the wise elder. A well-structured playpen mimics the complexity of their natural environment, preventing boredom and encouraging healthy exercise.
Supervision and Safety During Free-Roam Time
Active Supervision: What to Watch For
Free-roam time is not a “set it and forget it” activity. Your presence is the primary safety feature. You are their guardian, there to intervene before a curious nibble becomes a dangerous chew on an electrical cord. Stay in the room, on their level, and keep your eyes on them.
- Monitor for chewing on unsafe items: Baseboards, furniture, and cables are irresistible but hazardous.
- Watch for tense interactions: While some chasing is normal, listen for loud squeaks and watch for puffed-up fur, which signal real conflict.
- Check for escape attempts: A mouse constantly testing the playpen walls might be stressed or simply too clever for the current setup.
- Observe their energy levels: A mouse that suddenly becomes lethargic or stops exploring might be frightened or unwell.
- Ensure they are drinking: If sessions are long, place a small, heavy ceramic dish of water in the playpen.
Your attentive observation is what transforms a potentially risky situation into a secure and enriching adventure for your pets. I always sit on the floor with them, and it’s during these times I truly learn their individual personalities.
Training and Habituation to the Playpen
For a mouse, a giant, open playpen can be terrifying. The key is gradual introduction. Start by placing their entire familiar cage inside the playpen, allowing them to exit and explore on their own terms. This gives them a safe “home base” to retreat to. This is an important step in a complete guide to taming a scared, skittish mouse. Short, regular sessions with gentle positive reinforcement will help build their trust.
- Begin with short, 10-minute sessions to prevent overwhelming them.
- Use high-value treats, like a dab of peanut butter on a spoon, to lure them out and create positive associations.
- Keep the environment quiet and calm, avoiding sudden movements or loud noises.
- Gradually increase the session length as they become more confident and spend more time outside their cage.
- Always use the same cue, like a specific word or sound, to signal that playpen time is starting.
Jeffery was very nervous at first, but by moving at his pace, he now popcorns with excitement when he sees the playpen being set up. Patience during this habituation phase builds trust and ensures your mice see free-roam time as a reward, not a punishment. Without enrichment, mice in barren environments can develop learned helplessness and become apathetic even during handling or play. Keeping experiences varied and positive helps prevent that decline in motivation.
Cleaning and Hygiene for Your Playpen
Daily Spot-Cleaning After Free-Roam Sessions
A quick tidy after each session maintains a hygienic space and makes deep cleaning far less daunting. A five-minute spot-clean preserves the playpen’s appeal and protects your mice from bacteria that can grow on soiled bedding and forgotten food. I keep a small dustpan and brush dedicated to this task right by the playpen storage.
- Remove all soiled bedding and droppings.
- Pick up and discard any uneaten fresh food to prevent mold.
- Check for and remove any damp patches, especially in digging boxes or paper bedding.
- Wipe down any solid surfaces, like plastic platforms, with a damp cloth.
- Do a quick visual inspection of all toys and structures for damage or excessive wear.
This daily routine is your first line of defense against odors and illness, ensuring every play session starts with a clean slate.
Deep Cleaning and Material Replacement
Once a week, or more often if you have a larger group of mice, a thorough deep clean is necessary. A complete breakdown and sanitization of the playpen prevents the buildup of ammonia from urine and keeps the environment truly fresh. Do daily spot-cleaning, change bedding weekly, and schedule a full disinfection monthly to maintain optimal hygiene. These routines reduce odor and disease risk between deep cleans.
- Empty the entire playpen of all toys, bedding, and structures.
- Wash the playpen base and walls with a pet-safe disinfectant or a vinegar and water solution. Rinse thoroughly and dry completely.
- Inspect all toys and tunnels. Discard any cardboard or paper items that are heavily soiled or chewed.
- Wash plastic, ceramic, and wooden items with pet-safe soap and hot water. Ensure wood is completely dry to prevent mold.
- Replace all disposable bedding and substrates with fresh materials.
- Rebuild the playpen layout, perhaps with a slightly new configuration to re-spark curiosity.
Replacing chewable items like cardboard tubes regularly is not wasteful; it’s a crucial part of providing a stimulating and sanitary environment. I find this weekly reset also helps me notice if any toys are broken and need to be retired for safety.
Frequently Asked Questions
Can I find good mouse-proof playpen advice on Reddit?
Yes, Reddit communities like r/PetMice can be a valuable resource for real-world experiences and DIY tips from fellow mouse owners. Users often share photos, modifications, and recommendations based on what has worked for their own pets, providing practical insights you might not find elsewhere. However, always cross-reference any advice with reliable sources, as not all suggestions may be safe or effective for your specific setup.
Are there mouse-proof playpens available at Walmart?
Walmart may carry small animal playpens, but it’s crucial to inspect them carefully, as many are designed for larger pets like guinea pigs and may have gaps or materials unsuitable for mice. Look for models with bar spacing no wider than 1/2 inch, solid bases, and chew-resistant components, and be prepared to make modifications like adding mesh covers or reinforcing connections to ensure safety.
What is the GN-0002 mouse-proof playpen?
The GN-0002 appears to be a specific model number, possibly for a commercial playpen, but it’s not widely recognized in standard pet care circles. If you encounter this product, verify its features against mouse-proof standards, such as escape-proof design and non-toxic materials, and check for user reviews to assess its suitability. Always prioritize products with clear specifications and a reputation for safety in the small pet community.
Your Path Forward
Setting up a mouse-proof playpen transforms free-roam time into a secure adventure, letting your pets satisfy their natural curiosity without risks. By focusing on escape-proof barriers and engaging toys, you build a space where exploration feels both thrilling and safe for every mouse. Use sturdy, chew-proof panels and secure latches, and include tunnels, climbing branches, and foraging toys to keep mice mentally and physically active. Rotate toys regularly and supervise playtime to ensure safety.
Start with simple steps and watch how your mice respond—their unique personalities will guide you toward even better setups over time. This thoughtful approach deepens your connection and turns play sessions into cherished, stress-free highlights of your day together. Observing how they interact with different toys reveals their play preferences and basic psychology. Use those clues to rotate and choose toys that stimulate and comfort them.
Further Reading & Sources
Isabella is a passionate small pet enthusiast with over 8 years of experience in caring for mice. She loves sharing practical tips and heartfelt stories to help fellow mouse owners provide the best care for their tiny companions.
Mouse-Proofing & Prevention