How to Use Vertical Space in Your Mouse Enclosure
Does your mouse’s home sometimes feel too small, even with a spacious floor area? As someone who has shared my life with curious explorers like Kenny and cautious mentors like Gregory, I know that mice thrive when they can climb and explore upward. This guide will walk you through simple, effective methods to elevate your enclosure into a stimulating multi-level environment.
You will learn how to safely incorporate platforms, ropes, and hanging toys that encourage natural climbing instincts and provide endless entertainment. We will cover selecting materials, arranging elements for easy access, and ensuring everything is secure for your active companions.
Why Vertical Space Matters for Your Mice
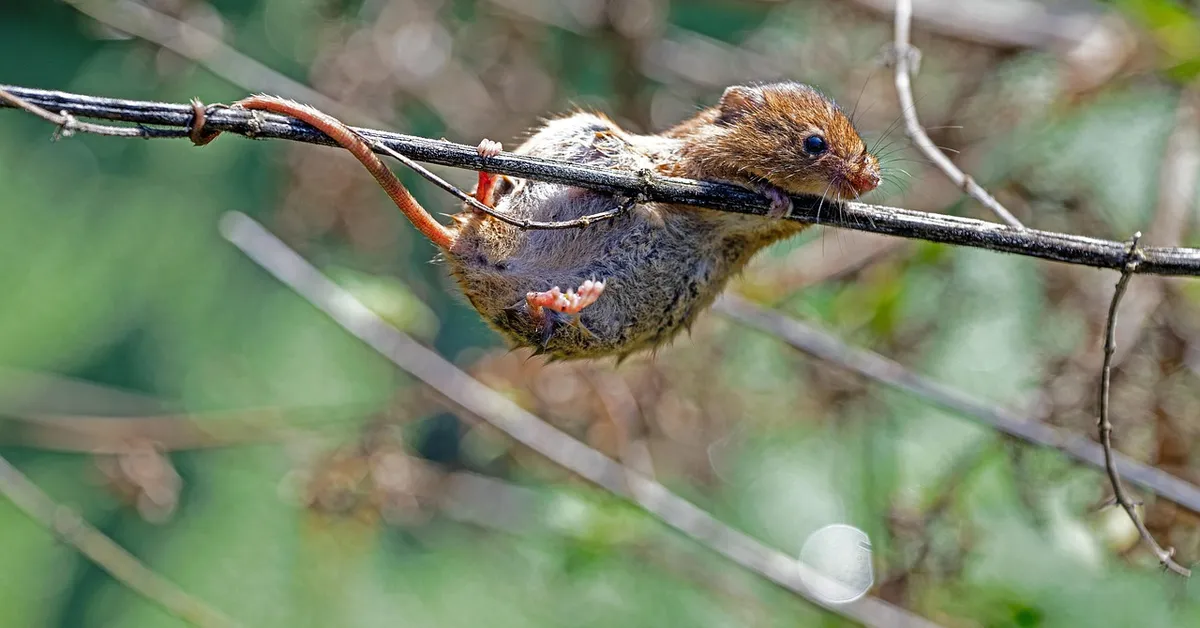
Think about a wild meadow mouse, scurrying up tall grasses to survey its territory or quickly climbing to escape a predator. Your pet mice carry those same deep-rooted instincts. Providing vertical space isn’t just an upgrade; it’s a way to honor their natural behaviors and dramatically improve their quality of life. A flat, single-level enclosure simply doesn’t offer the mental and physical stimulation these clever creatures crave.
From my own experience, the change in my mice’s activity levels was immediate and incredible once I introduced climbing opportunities. Climbing engages different muscle groups than running on a wheel, promoting overall fitness and preventing obesity. It’s like the difference between a leisurely walk and a full-body workout. My adventurous mouse, Kenny, will spend hours meticulously navigating a network of ropes and branches, his little body a testament to the strength he’s built from climbing, jumping, and exploring.
- Encourages Natural Behaviors: Mice are not purely ground-dwellers; they are exploratory climbers by nature.
- Prevents Boredom: A multi-level environment presents constant new challenges and sights, reducing stress behaviors like bar chewing.
- Maximizes Small Footprints: For those of us with limited floor space, building upwards is the secret to a spacious, enriching habitat.
- Creates Individual Territories: Shyer mice, like my Jeffery, appreciate high-up hideouts where they can observe the action safely from above.
Planning Your Multi-Level Mouse Habitat
Building a mouse skyscraper is an exciting project, but a little forethought ensures it’s both fun for them and manageable for you. The goal is to create a secure, interconnected world that feels limitless, not a precarious tower of hazards. Rushing this process can lead to unstable structures and stressed pets.
Choosing the Right Cage Design for Vertical Additions
Your cage is the foundation of your entire vertical project. The wrong choice can make adding levels difficult or even dangerous. Look for a cage with plenty of horizontal bar spacing or built-in mounting points, as these are your anchors for the entire setup. Solid-walled tanks or bin cages require more creativity but are absolutely workable. If you’re planning to build a multilevel bin cage, plan attachment points and weight distribution from the start. With the right supports and creative mounting, even solid-walled bins can be stacked into safe, usable levels.
- Wire Cages: Ideal for vertical expansion. You can easily zip-tie platforms, ropes, and ladders directly to the bars. Ensure bar spacing is narrow enough (less than 1/4 inch) to prevent escapes.
- Glass or Plastic Tanks: Use aquarium-safe silicone to adhere ledges or use heavy-duty suction cups designed for reptiles. Always test suction cup strength frequently.
- Bin Cages: You can drill small holes in the sides to thread zip-ties or wire for securing items. This is a very customizable and budget-friendly option.
I made the mistake early on of using a cage with very wide bar spacing, and while my older, calmer mouse Gregory never attempted an escape, my impulsive Kenny saw it as a personal challenge. Safety is the non-negotiable first step in any vertical design.
Mapping Out Levels Before You Build
Before you attach a single item, grab a piece of paper and sketch your vision. A quick drawing helps you visualize traffic flow, identify potential dead ends, and ensure you have multiple routes between popular areas. Mice should never be forced into a single file line or have to backtrack significantly.
- Identify Anchor Points: Look at your cage walls and note all the spots where you can securely attach items. These are your building corners.
- Plan the “Highways”: Create at least two primary climbing routes to key areas like the food dish, water bottle, and main sleeping nest. This prevents traffic jams and bullying.
- Incorporate Rest Stops: Mice are sprinters, not marathon climbers. Place small platforms or wide branches at intervals for them to pause and catch their breath.
- Consider the Fall Zone: Mice can and will fall. Make sure the path from any high point to the cage floor is cluttered with soft, break-falling items like hammocks, rope nets, or deep bedding.
When I designed the current setup for my trio, I made sure Gregory had a stable, easy-to-access upper platform for his naps, while Kenny’s more adventurous route involved a rope bridge and a swinging coconut. A well-mapped habitat caters to the unique personalities of every mouse in your care.
Adding Platforms and Shelves to Create Multiple Levels
Transforming a simple floor plan into a multi-story mouse mansion is one of the most rewarding projects you can undertake. Building upwards gives your curious mice a whole new perspective on their world and dramatically increases their usable living area. I’ve watched my own mice, like the ever-adventurous Kenny, spend hours exploring new levels I’ve installed, and the mental stimulation it provides is incredible.
Selecting Safe Platform Materials
The foundation of a good level is the material it’s made from. You must consider both safety and durability, as mice will chew on everything.
- Untreated Kiln-Dried Pine or Aspen Wood: These are my top choices. They are safe for gnawing and relatively easy to clean. Avoid cedar or any chemically treated woods, as the fumes and resins are toxic to small animals.
- Food-Srade Ceramic Tiles: I often use small tiles as platform surfaces, especially under water bottles. They stay cool, are impossible to chew, and are a breeze to wipe clean.
- Corn-Based Plastics: Some hard plastics marketed as “chew-safe” can be used, but I use them sparingly. Even these can create sharp edges if chewed extensively, so inspect them daily.
- Natural Cork: A fantastic option for ledges and smaller platforms. It provides a great gripping surface and is completely safe if ingested in small amounts.
Securing Platforms to Prevent Collapse
A wobbly shelf is a dangerous shelf. A secure installation is non-negotiable for your mice’s safety and peace of mind.
- Use Robust Supports: Don’t rely on flimsy suction cups. I use wooden dowels cut to size or sturdy, non-toxic plastic L-brackets designed for small animal habitats.
- Double Up on Zip Ties: For wooden platforms, I always drill small holes in the corners and use multiple nylon cable ties to anchor them firmly to the cage bars. Check these ties weekly for any signs of chewing.
- Create a Stable Base: Ensure the platform itself is wide enough not to tip when a mouse runs across it. For larger levels, I add a central support leg made from a block of wood for extra stability.
- The “Wiggle Test”: After installing any new platform, give it a firm but gentle shake from the outside. If it moves more than a tiny bit, reinforce it immediately. My older mouse, Gregory, appreciates a solid, unmoving surface under his paws.
Installing Ramps and Bridges for Easy Access
Ramps and bridges are the highways and byways that connect your vertical world. Without well-planned access points, your beautiful upper levels become inaccessible islands, frustrating your mice instead of enriching them. I like to create multiple routes between levels to encourage natural exploration and prevent traffic jams.
Choosing Ramp Angles for Different Mouse Ages
Not all ramps are created equal, and the ideal incline depends heavily on your mouse’s age and agility.
- For Young, Energetic Mice: A steeper angle up to about 60 degrees is often fine. Mice like my Kenny scramble up them with ease. Cover these ramps with a rough material like burlap for grip.
- For Adult Mice: A gentler slope of around 30-45 degrees is ideal. This is a comfortable, sustainable angle for daily use without putting strain on their joints.
- For Older or Less Agile Mice: My Gregory needs a very gradual incline, no more than 20 degrees. I sometimes even create “staircase” ramps with small platforms as rest stops. A ramp that is too steep will simply not be used by an older mouse.
- Universal Tip: Always ensure the ramp surface is textured. A smooth plastic ramp is a slipping hazard for any mouse, regardless of age.
Introducing Climbing Structures and Vertical Enrichment
This is where you can get truly creative. Climbing structures tap directly into your mouse’s natural instincts to explore vertical spaces, providing unmatched physical and mental exercise. Watching them navigate a complex web of branches and ropes is a joy. For full cognitive enrichment, pair climbing structures with the best enrichment toys that stimulate a mouse’s mind—puzzle feeders, foraging tubes, and chewable puzzles encourage problem-solving and exploration. Rotating toys regularly keeps challenges fresh and curiosity high.
Using Natural Branch Perches
Nothing beats the variety and texture of natural branches. They are the ultimate climbing gym.
- Safe Wood Types: Apple, pear, hazel, and birch are excellent choices. Ensure they are from an unpolluted area and have never been sprayed with pesticides.
- Preparation is Key: I scrub branches thoroughly with a brush and hot water, then bake them in the oven at 200°F (93°C) for about 30-45 minutes to kill any pests or mold. Let them cool completely before placing them in the enclosure.
- Secure Placement: Weave branches through the cage bars or use sturdy zip ties to create a secure climbing frame. Arrange them at different angles to create a challenging and interesting path to the top.
Adding Vertical Tunnels and Tubes
Tunnels that go up and down add an exciting dimension to exploration, serving as both a climb and a hide.
- Cardboard Tubes: Simple toilet paper or paper towel tubes are a free and fantastic option. I wedge them vertically between platforms or at a slight angle. Mice love scurrying through them, and you can replace them as they get chewed.
- Rope or Hemp Nets: I attach a piece of bird rope netting to the side of the cage to create a soft, climbable wall. My smallest mouse, Jeffery, often uses this to get to a higher shelf when he feels unsure about a ramp.
- Commercial Plastic Tubes: While I generally prefer natural materials, a well-secured vertical tube system can be a fun permanent fixture. Just be sure it has adequate ventilation and you can access it for cleaning.
- Create a “Tree Trunk”: I once bundled several thick branches together with jute twine to create a thick, multi-textured central climbing post. It became the most popular feature in the cage, with mice running up, down, and around it all day long.
Hanging Hammocks and Soft Resting Spots
Elevating your mice’s comfort to new heights begins with strategic hanging spots. My mice, especially Kenny, spend hours surveying their domain from a lofty hammock. Providing multiple soft, suspended beds satisfies their instinct to nest in elevated, secure locations. You can easily create a multi-level lounge area that encourages natural climbing and resting behaviors.
- Use a variety of materials like fleece, felt, or breathable cotton for different textures.
- Secure hammocks with sturdy metal C-clips or zip ties to cage bars, ensuring they can hold a mouse’s weight with movement.
- Hang them at different levels; my older mouse Gregory prefers a mid-level spot, while the young ones love the very top.
- Layer hammocks to create a “sky village” where mice can hop from one to another.
- Include a fully enclosed “pouch” style hammock for shy mice like Jeffery who need a dark, secure hideaway up high.
Creating Feeding and Water Stations at Different Heights
Scatter feeding and watering points throughout the vertical landscape to turn mealtime into an engaging activity. Placing food and water at various levels mimics the foraging behavior mice would exhibit in the wild, providing crucial mental stimulation. Try using several small food bowls or lightly scattering pellets so they have to hunt for their meals. I’ve watched my trio become more active and curious since I stopped putting all their resources on the cage floor.
- Mount small, heavy ceramic dishes onto sturdy wooden platforms secured to the cage walls.
- Use bird-style seed skewers or veggie kabobs hung from the roof to encourage stretching and balancing for treats.
- Install a water bottle on the middle level and another up high to prevent competition and ensure constant access.
- Create a “foraging wall” by smearing soft foods like banana on a clean stone attached vertically.
- Hide small caches of dry food in hanging toys or woven grass balls to promote problem-solving.
Maintaining Safety in Vertical Setups
A beautifully complex vertical habitat is only successful if it’s fundamentally safe. Every climbing structure and high platform must be evaluated for stability and fall risk before your mice move in. I learned this the hard way when an poorly secured ramp gave way-thankfully, no one was hurt, but it was a sobering reminder.
Preventing Falls and Injuries
Mice are agile, but they can still misjudge a jump or slip, especially when young or elderly. Strategic placement of soft landings and fall-breakers is the single most important step in vertical cage safety. Think of your cage layout as a series of safe ledges rather than a sheer cliff face.
- Ensure no single fall is greater than 12 inches by spacing platforms and hammocks closely.
- Place deep, soft substrate areas like shredded paper or hay beneath the highest climbing structures.
- Avoid slippery materials like smooth plastic; always use textured wood, rope, or branches for climbing surfaces.
- Secure all ropes, ladders, and bridges at both ends to prevent swinging or tipping.
- Regularly check for and sand down any splinters on wooden components that could injure tiny feet.
Ensuring Escape-Proof Design
A curious mouse will test every gap and seam in their enclosure. An escape-proof vertical design requires meticulous attention to the spaces between your additions and the main cage structure. My mouse Jeffery, the smallest of the group, is a master at finding the tiniest gaps, so I am constantly vigilant.
- Fill any gap wider than 1/4 inch with safe materials like moss, cardboard, or hay stuffed securely into the space.
- Double-check that all doors and latches remain fully functional and cannot be nudged open by a persistent mouse.
- When adding DIY platforms, ensure they fit snugly against the cage walls without creating a vertical channel a mouse could shimmy up.
- Inspect the entire setup from the inside, looking for any potential “ladder” effect created by overlapping toys and ledges leading to the top.
- Use aquarium-grade silicone to permanently seal any questionable corners or joints in wooden structures you build yourself.
Cleaning and Maintaining Multi-Level Enclosures

Keeping a multi-level home tidy requires a different strategy than a single-floor setup. A consistent cleaning routine prevents the entire habitat from needing a deep clean all at once, which is far less stressful for your mice. I find that tackling one level per day works beautifully, allowing my mice, like Kenny and Gregory, to maintain their scent markings and feel secure. This fits neatly into a daily, weekly, and monthly cleaning schedule—daily spot checks, weekly bedding and accessory refreshes, and a monthly deep clean of each level. Spreading tasks out this way keeps maintenance manageable while preserving the mice’s familiar scents and sense of safety.
Effective Weekly Cleaning Strategy
- Spot Clean Daily: Remove soiled bedding and any uneaten fresh food from platforms and hammocks every single day. This is the most impactful habit for odor control.
- Rotate Deep Cleaning: Each week, choose a different level or major accessory for a thorough scrub. One week it’s the top platform, the next it’s the mid-level hammock.
- Use a Dedicated Brush Set: I keep a set of small brushes and bottle cleaners specifically for reaching into the corners of lofts and the bars of woven rope ladders.
- Secure Everything Post-Clean: Always double-check that all platforms, ramps, and bridges are firmly reattached after you’ve put the enclosure back together. A wobbly perch is a safety hazard.
DIY Vertical Cage Modifications on a Budget
You do not need a fancy budget to create an exciting vertical world. Some of the best climbing structures I’ve used were made from items already in my home. Transforming simple materials into mouse-sized adventures is incredibly rewarding and easy on your wallet.
Building Simple Wooden Platforms
Untreated, mouse-safe wood like poplar or birch is perfect for this project. I watch my mice, especially the bold Kenny, use these as lookout points and mid-air rest stops. This short guide covers choosing safe woods and branches and preparing branches for a mouse cage—sand rough edges and anchor them securely. Proper preparation keeps the climbing structures both enriching and safe.
- Select Your Wood: Choose a piece that is at least 1/2 inch thick for stability. A small plank from a craft store is ideal.
- Cut to Size: Using a small handsaw, cut the wood into squares or rectangles. A good starting size is 4×4 inches.
- Smooth the Edges: Thoroughly sand every surface and edge until they are completely smooth to prevent splinters.
- Create Support Ledges: Glue small wooden blocks or cork pieces to the underside of the platform’s corners using pet-safe wood glue.
- Attach to the Cage: Use sturdy, rust-proof cable ties or cage-safe wire to securely fasten the platform to the enclosure bars at your desired height.
Making No-Sew Fabric Hammocks
Hammocks provide soft, elevated lounging areas that mice adore. My more cautious mouse, Jeffery, feels safe nestled in a high hammock where he can observe everything. In the ultimate guide to mouse cages, I’ll explain how to choose and place hammocks for comfort, safety, and enrichment. Small details like size, material, and secure attachments can make all the difference.
- Gather Your Materials: You will need a square of fleece fabric (it doesn’t fray!) and four short pieces of cotton rope or sturdy yarn.
- Prepare the Fabric: Cut your fleece into a square, roughly 6×6 inches for a cozy size.
- Create the Corners: Poke a small hole in each corner of the fleece square, about half an inch from the edge.
- Thread and Tie: Push one piece of rope through each hole and tie a large, secure knot underneath so it can’t pull back through.
- Hang It Up: Tie the free ends of the ropes to the top of the cage bars, adjusting the height and sag to your liking. Check these knots and the fabric for wear every few days, as enthusiastic climbers will test its strength.
Watching Your Mice Adapt to Vertical Space
Introducing height to your mouse’s world is like giving them a new dimension to explore. Their reactions can be a fascinating window into their unique personalities. Patience is your greatest tool, as each mouse will approach this new territory at their own pace and in their own way.
You might see your most adventurous mouse, like my Kenny, scaling a new rope ladder within minutes of it being installed. Bold explorers often treat new heights as a personal challenge to be conquered immediately. They will be the first to test the stability of a new platform and find the highest vantage point.
Other mice, particularly older or more cautious ones like my Gregory, will be far more methodical. A thoughtful mouse prefers to observe from the ground for a day or two before tentatively placing a single paw on the first rung. They may only travel halfway up for the first week, and that is perfectly normal and acceptable behavior. Baby mice show similar cautiousness. They usually begin short forays at around two weeks and are typically ready to leave the nest by about three weeks when they are weaned.
Watch for their problem-solving skills to shine. They might find a new, unexpected route to the top of a platform, bypassing the ramp you so carefully placed. This creative pathfinding is a brilliant sign of a stimulated and engaged mind. Avoid the urge to “help” them or place them on high perches; allowing them to build confidence through their own exploration is the true key to success.
Frequently Asked Questions
What is a vertical mouse cage?
A vertical mouse cage is an enclosure designed to maximize height rather than just floor space, incorporating multiple levels, platforms, climbing structures, and hanging elements. This setup allows pet mice to engage in natural behaviors like climbing and exploring upward, transforming their habitat into a stimulating, multi-story environment that better reflects their instincts.
Are vertical mice good?
Yes, vertical enclosures are highly beneficial for pet mice, as they provide essential physical and mental enrichment. By encouraging climbing and exploration, these setups help prevent boredom, reduce stress behaviors, and promote overall fitness, making them an excellent choice for supporting a mouse’s well-being.
Is a vertical mouse better?
A vertical enclosure can be better than a purely horizontal one because it efficiently uses space and offers more opportunities for natural activities like climbing and perching. However, its effectiveness depends on proper design, including secure platforms and fall prevention, to ensure it meets the safety and accessibility needs of all mice, from energetic juveniles to less agile adults.
Your Vertical Adventure Awaits
Transforming your mouse enclosure with vertical elements isn’t just about adding more stuff; it’s about creating a dynamic world that nurtures their natural instincts to climb, explore, and feel secure. You’ve now got the blueprint to turn empty air into an exciting, three-dimensional habitat that will keep your mice active and engaged for hours.
Start with one or two ideas that feel manageable, watch how your mice interact with the new layout, and let their joyful exploration guide your next creative step. Seeing my own mice, like the ever-curious Kenny, confidently navigate a new rope bridge or find a cozy nap spot in a high-up hammock is the ultimate reward for a job well done.
Further Reading & Sources
- Mouse Cage Size: What Size Cage Do Mice Need? – LittleGrabbies
- Extra Large Mouse Cage | Wayfair
- r/PetMice on Reddit: This is my first time owning mice, is the cage setup good?
Isabella is a passionate small pet enthusiast with over 8 years of experience in caring for mice. She loves sharing practical tips and heartfelt stories to help fellow mouse owners provide the best care for their tiny companions.
Enrichment Ideas