Master Small Animal Photography with Perfect Lighting
Have you ever tried to capture a clear, vibrant photo of your tiny pet, only to be frustrated by shadows, glare, or a dark, blurry result? I’ve spent years photographing my own mice, like Kenny and Jeffery, and I know how tricky it can be to get the light just right. This guide will give you straightforward, effective techniques to illuminate your small animals beautifully, making your photography sessions rewarding and fun.
We will walk through the essentials step by step, covering how to use natural light without harsh contrasts, select gentle artificial lighting that keeps pets comfortable, and position your setup to avoid startling movements or unflattering shadows.
Why Lighting Matters When Photographing Your Pet Mice
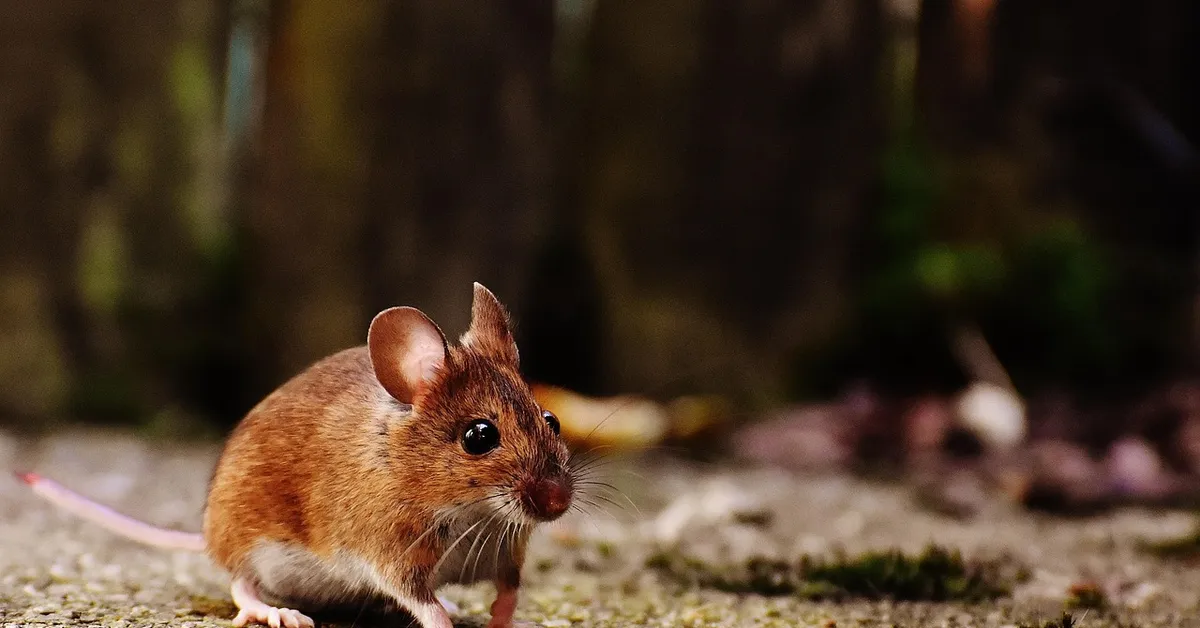
Lighting is the invisible hand that sculpts your photograph, and with a subject as small and nuanced as a pet mouse, it becomes everything. Proper illumination doesn’t just prevent a blurry, dark photo; it reveals the individual whiskers, the satin texture of their fur, and the bright curiosity in their eyes. Mice are tiny, fast, and full of delicate details that get lost without thoughtful lighting.
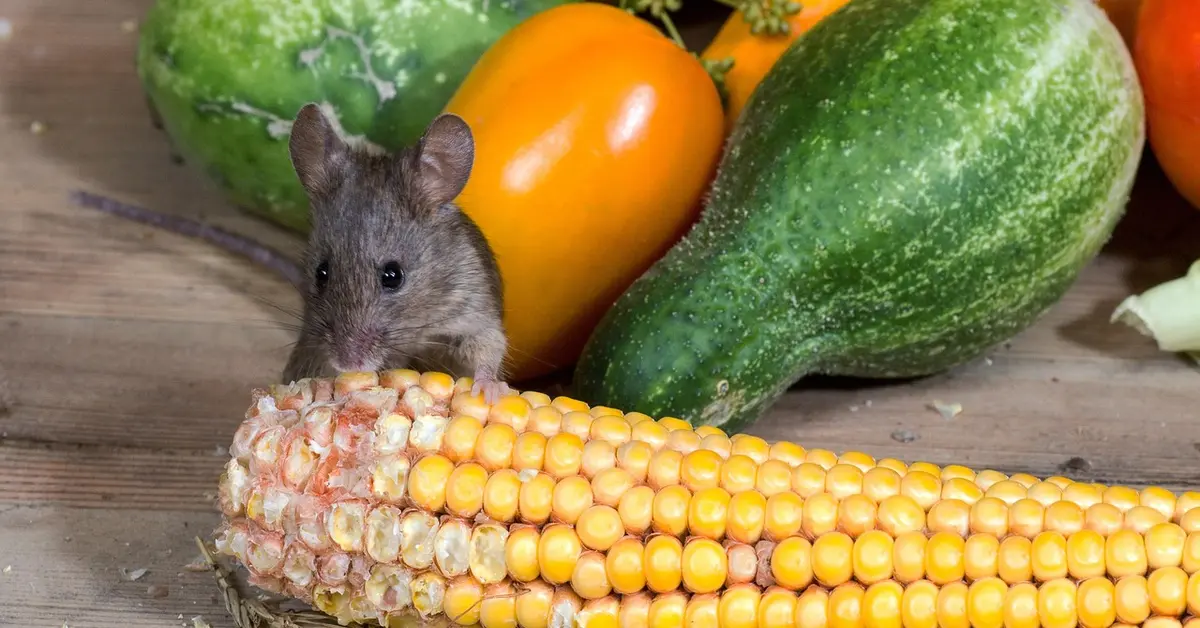
Harsh, direct light can startle a mouse and create unflattering, deep shadows that hide their form. My own mouse, Kenny, is a bold explorer, but a sudden camera flash turns him into a startled blur. Gentle, diffused light is the key to capturing their true character without causing them stress or anxiety. It allows you to freeze their quick, playful movements in a clear, beautiful moment.
Think of light as your primary tool for storytelling. The right lighting setup can transform a simple snapshot into a portrait that conveys your mouse’s unique personality, whether it’s the serene wisdom of an older mouse or the cheerful energy of a young one. It’s the difference between a picture of a mouse and a photograph of your friend.
Natural Light vs Continuous Lighting for Mouse Photos
Choosing your light source is your first major decision. Both natural light and continuous artificial light have their place in a mouse photographer’s toolkit, and the best choice often depends on your mouse’s temperament and the mood you want to create. In this visual guide to choosing a healthy, active mouse, lighting is crucial: it reveals coat condition, posture and responsiveness. Try different light setups to capture movement and energy so you can better judge health and temperament.
- Natural Light is soft, flattering, and completely free. It’s wonderful for creating a warm, authentic feel.
- Continuous Lighting (like LED panels) gives you total control. You can use it any time of day and shape the light exactly how you want it.
I often use a combination. I’ll start with a soft LED panel for a consistent base light and then position my setup near a window to add a touch of natural warmth and life to the scene. This hybrid approach gives you the reliability of artificial light with the beautiful quality of natural light.
Working with Window Light and Soft Natural Light
A north-facing window is a mouse photographer’s best friend, providing soft, consistent light throughout the day without the harsh glare of direct sun. Position your mouse’s play area or photo enclosure a few feet away from the window, never directly in the sunbeam. Direct sunlight is too intense and can make your mouse uncomfortably warm.
Timing is everything. The golden hours-shortly after sunrise and before sunset-provide a wonderfully warm and soft light. This gentle, golden light is perfect for highlighting the rich colors of a dark brown mouse like Gregory, making his fur look luminous. If you only have a sunny window, hang a sheer white curtain over it. This instantly transforms harsh light into a beautiful, soft glow that is perfect for photography.
- Use a large piece of white poster board or a foam core on the shadow side of your mouse to bounce light back onto them, filling in dark areas.
- Watch your mouse’s behavior. If they are squinting or trying to hide from the light, it’s too bright.
- Overcast days are fantastic for mouse photography, as the clouds act as a giant natural softbox.
Choosing LED Panels and Continuous Light Sources
For consistent results regardless of the weather or time, a small LED panel is an invaluable tool. Look for a light that is dimmable and has adjustable color temperature, so you can match the warm or cool feel of the light to your scene. This control lets you create a cozy, evening look or a bright, daytime feel at any hour.
The biggest advantage of LEDs is their cool operation. Unlike hot halogen lights, LEDs won’t make your mouse’s environment uncomfortably warm, which is crucial for their comfort and safety. You can position the light close enough to be effective without worrying about overheating your tiny subject.
When setting up your LED panel, avoid pointing it directly at your mouse. Instead, aim it at the ceiling or a nearby white wall to bounce the light. Bouncing the light creates a much larger, softer light source that wraps gently around your mouse, eliminating harsh shadows and reducing the chance of them being startled. If you must point it directly, always diffuse it first with a specialized photography diffusion panel or even a layer of parchment paper taped securely over the light.
- Start with your LED panel on a very low power setting.
- Position it at a 45-degree angle to your mouse, slightly above their eye level.
- Observe your mouse. If they seem frozen or anxious, the light is too bright or too direct.
- Use a small reflector opposite the light to ensure both sides of your mouse are nicely lit.
Essential Light Modifiers for Soft, Flattering Mouse Portraits
Using Softboxes and Umbrella Diffusers
Direct camera flash is a harsh, startling light that will frighten your mouse and create unflattering, sharp shadows. To capture the delicate texture of their fur and the gentle curiosity in their eyes, you must soften the light source. I use a small softbox positioned slightly to the side and above their enclosure, which creates a beautiful, wrap-around light that mimics a soft window glow. This soft, continuous light keeps them calm and makes it much easier to film natural, engaging behaviors. For video tips, shoot at eye level with a steady camera and longer takes so you capture their subtle movements and expressions.
- Small Octagonal Softboxes: These create a circular catchlight in the mouse’s eye, adding life and dimension to the portrait.
- Shoot-Through Umbrellas: A fantastic and affordable option that scatters light broadly, softening shadows under the chin and around tiny paws.
- Positioning is Key: Place your modifier at a 45-degree angle to the mouse to create gentle depth and shape, avoiding a flat, boring look.
DIY Diffusion Solutions on a Budget
Professional gear isn’t a requirement for beautiful mouse photos. Some of my favorite shots of my mouse, Jeffery, were taken using simple household items to diffuse a harsh lamp. These same techniques work especially well for solid-colored mice, where even lighting brings out their rich, uniform tones without harsh shadows. A neutral background and soft glow help emphasize color and texture. His white fur can easily get “blown out” by bright light, but a simple sheet of parchment paper taped over a desk lamp creates a perfect, soft glow.
- Parchment Paper or Vellum: Tape it directly over a small, cool-running LED lamp to create an instant, miniature softbox.
- White Bed Sheet or T-Shirt: Drape a thin white fabric between your light source and the scene for a large, ultra-soft light effect.
- Styrofoam Cooler Panel: Cut a panel from a white cooler and use it as a bounce card or a diffuser; it’s lightweight and highly reflective.
Reflector Use and Fill Light Techniques
Even with soft light, you can end up with shadows that are too dark, hiding your mouse’s sweet features. A simple reflector is your secret weapon for filling in those shadows without adding more complicated equipment. I keep a small piece of white poster board near my setup to bounce light back into the scene, which perfectly illuminates the underside of my curious mouse Kenny’s face as he sniffs the air.
- White Cardstock: Ideal for a subtle, natural fill light that doesn’t overpower the main light.
- Aluminum Foil: Crumple it slightly and tape it to cardboard for a brighter, more direct fill light.
- Positioning the Reflector: Place it opposite your main light source, angling it to bounce light precisely into the shadow areas you want to brighten.
Camera Settings That Work with Mouse Photography Lighting
Getting the light right is only half the battle; your camera settings need to work in harmony with it. Mice are small, fast, and often in shadowy corners, so your settings must be a careful balance of speed and light sensitivity. Clear, well-exposed footage is essential for applying a mouse quality of life framework, because objective measures like activity, grooming, and posture depend on accurate detection. Optimized settings let you assess welfare unobtrusively and consistently.
ISO Management for Small Animal Shots
A high ISO lets you shoot in lower light, but it also introduces digital grain or “noise.” Start with your ISO as low as possible (e.g., ISO 100 or 200) and only increase it until you achieve a fast enough shutter speed to freeze motion. With my older mouse Gregory, who moves more slowly, I can often keep my ISO under 800. For my energetic mouse Kenny, I might push to ISO 1600 to keep up with his bursts of speed.
Shutter Speed for Capturing Mouse Movement
This is arguably the most critical setting for mouse photography. A slow shutter speed will result in a blurry, unrecognizable blob. To clearly capture a sniff, a scratch, or a perked ear, your shutter speed needs to be 1/250th of a second or faster. For full-on sprints across the cage, I don’t hesitate to use 1/500th or even 1/1000th of a second to ensure tack-sharp images. There’s more on that in this post.
White Balance and Exposure Adjustments
Artificial light can cast strange color tints, making your mouse’s beautiful gray or brown fur look orange or blue. Shoot in RAW format and set a custom white balance using a gray card in your shooting light to ensure fur colors are rendered accurately. For exposure, I often use a technique called “Expose to the Right,” slightly overexposing the image (without clipping highlights) to keep shadow details visible and minimize noise in post-processing.
Setting Up Your Mouse Photography Lighting
Main Light Placement and Angles
Position your main light source slightly above and to the side of your mouse, aiming for a 45-degree angle to cast soft, flattering shadows that define their tiny features without overwhelming them. This angle mimics natural daylight, reducing the chance of startling your pet while highlighting their delicate fur texture and whisker details. Avoid placing the light directly overhead or head-on, as this can create harsh glares or unflattering flatness in the image. Good lighting will also bring out your mouse’s true colors and subtle markings, which is essential when documenting and comparing varieties. This helps ensure accurate entries in a pet mouse colors and markings guide.
- Use a diffuser or softbox to spread light evenly and prevent hot spots on their coat.
- Experiment with raising the light higher for a more sculpted look, especially for mice with distinct markings like Kenny’s light gray fur.
- Keep the light at a safe distance to avoid heat stress, as mice are sensitive to temperature changes.
Adding Fill Flash or Secondary Lights
Introduce a fill flash or a secondary light on the opposite side of your main source to gently lift shadows under the chin or around the ears, creating a balanced exposure. Fill lights help reveal subtle expressions and movements, like when Jeffery’s twitchy curiosity comes through in a shot. Set the fill light to a lower intensity than the main one, ensuring it complements rather than competes with the primary illumination.
- Start with a fill light set to half the power of your main light for a natural effect.
- Position it slightly lower to fill in shadows from below, mimicking ambient room light.
- Use a bounce card or reflector as a budget-friendly alternative to soften harsh contrasts.
Creating Catchlights in Tiny Mouse Eyes
To make your mouse’s eyes sparkle with life, angle a small light source or reflector so it reflects as a bright dot in their pupils, known as a catchlight. Catchlights add depth and emotion to portraits, transforming a simple photo into a captivating glimpse of their personality. Aim for a soft, circular reflection rather than a sharp glare, which can be achieved with a ring light or a carefully placed LED panel.
- Place the light slightly off-center to avoid a “deer in headlights” look and maintain a natural feel.
- Adjust the size of the catchlight by moving the light closer or farther away-smaller for subtlety, larger for emphasis.
- Observe how different mice respond; Gregory’s calm demeanor might hold still for precise adjustments, while Kenny’s energetic moves require quicker setups.
Lighting Styles for Different Mouse Photo Moods
High Key Lighting for Bright, Cheerful Mouse Photos
High key lighting uses abundant, even light to minimize shadows and create a luminous, upbeat atmosphere, perfect for capturing playful moments or cheerful mice like Jeffery. This style emphasizes innocence and joy, making it ideal for showcasing their playful antics or bright white fur against a clean background. Overexpose the scene slightly by using multiple soft light sources or a large window on a sunny day, but monitor your mouse for signs of discomfort from the brightness.
- Set up two or more diffused lights at equal intensity on either side of your mouse for uniform illumination.
- Choose light-colored backdrops, such as white or pastel paper, to enhance the bright effect.
- Keep sessions short to maintain your mouse’s comfort, as high key setups can be intense for small animals.
Low Key Lighting for Dramatic Mouse Portraits
Low key lighting relies on deep shadows and strong contrasts to evoke mystery and depth, highlighting traits like Gregory’s wise, grounded nature. By using a single focused light and allowing most of the scene to fall into darkness, you draw attention to your mouse’s expressive eyes or unique fur patterns. Position the light at a steep angle or use a snoot to control the beam, creating pools of light that emphasize shape and texture without distracting elements.
- Start with a main light at a 60- to 90-degree angle to one side, casting long shadows across the body.
- Reduce or eliminate fill lights to maintain rich blacks and a moody ambiance.
- Use a dark backdrop to enhance the dramatic effect and minimize reflections.
Backlighting for Silhouettes and Rim Lighting
Place your main light behind your mouse to create striking silhouettes or a glowing rim of light around their edges, adding a sense of magic or adventure to your photos. Backlighting can transform ordinary shots into artistic statements, perfect for capturing a mouse’s profile or highlighting the fine hairs on their ears and tail. Ensure the light is strong enough to outline their form but not so bright that it causes lens flare or obscures details. Also, remember to use safe props during your mouse photoshoots to ensure your little model’s comfort and safety.
- Angle the light directly behind and slightly above your mouse for a clean silhouette against a bright background.
- For rim lighting, adjust the position to graze the edges of their fur, creating a halo effect that separates them from the backdrop.
- Use a lens hood to reduce flare and meter for the background light to maintain proper exposure on your subject.
Common Lighting Problems and How to Fix Them
Eliminating Harsh Shadows on Small Subjects
Mice are tiny, and direct, harsh light can completely overwhelm their delicate features, creating deep, unflattering shadows that hide their expressive faces. Think of your mouse not as a subject to be brightly lit, but as a miniature sculpture to be gently illuminated. I learned this the hard way trying to photograph my impulsive mouse, Kenny; a direct flash made him look like a featureless gray blob with two black eyes. That’s what prompted me to build a miniature photo studio tailored for mice — soft diffusers, tiny reflectors and low‑powered lights that keep details and calm my subjects. In the sections that follow I’ll show simple, budget-friendly ways to set one up.
- Diffuse Your Light Source: Never point a bare bulb or flash directly at your mouse. Tape a piece of white parchment paper or a thin white cloth over the light to soften its output.
- Use a Bounce Card: Position a piece of white cardboard or foam core opposite your main light. It will reflect soft light back onto the shadowed side of your pet.
- Embrace Window Light: On a cloudy day, the soft, filtered light from a north-facing window is the most beautiful and forgiving light source you can find for free.
Fixing Motion Blur in Low Light
Mice are bundles of fast, twitchy energy, and a slow shutter speed will turn your photo of Jeffery into a cheerful white blur. The key to freezing motion is not just more light, but a faster capture speed from your camera. You need to outsmart their quick, darting movements. Their speed and agility come from evolution: lots of fast-twitch muscle fibers, a light frame, and lightning reflexes. That’s why matching your shutter to their biology is essential if you want a sharp shot.
- Increase Your ISO: Don’t be afraid to raise your camera’s ISO setting. A slightly grainy photo is always better than a completely blurry one.
- Prioritize Shutter Speed: Set your camera to Shutter Priority mode (often marked as ‘Tv’ or ‘S’) and choose a speed of at least 1/250th of a second to stop most action.
- Use Burst Mode: Take several photos in rapid succession. One frame in the sequence is almost guaranteed to be sharp, capturing a perfect, still moment.
Correcting Color Casts from Mixed Lighting
Your cozy living room might have warm table lamps and cool daylight from a window, creating a strange orange and blue color mix on your mouse’s fur. Mixed lighting confuses your camera’s brain, resulting in photos where your brown mouse, Gregory, looks strangely orange or sickly green. This is one of the trickiest problems to solve in-camera.
- Choose One Light Source: The simplest fix is to turn off all indoor lights and rely solely on natural window light for a consistent color temperature.
- Set a Manual White Balance: Use a white piece of paper or a gray card in your mouse’s habitat under the lights you’ll be using. Tell your camera to use that as its “true white” reference.
- Shoot in RAW Format: If your camera allows it, shoot RAW files instead of JPEGs. This preserves all the color data, making it incredibly easy to fix color casts later on your computer.
Managing Reflections on Glass Cages or Enclosures
Shooting through glass or plastic is a classic challenge, often leaving you with a perfect photo of your own reflection holding the camera. The goal is to make the transparent barrier between you and your pet completely disappear from the final image. A clean enclosure is your first and most important step.
- Shoot at an Angle: Never shoot straight-on perpendicular to the glass. Position your camera at a 45-degree angle to the surface to deflect reflections away from the lens.
- Use a Lens Hood or Your Hand: Create a shield around your lens by cupping your hand or using a dedicated lens hood to block light from behind you from hitting the glass.
- Turn Off the Flash: An on-camera flash will guaranteed create a massive bright spot on the enclosure. Use ambient, diffused light instead.
- Polarizing Filter: For a more advanced solution, a circular polarizing filter on your lens can electronically cancel out reflections from glass and plastic surfaces.
Post-Processing Lighting Corrections for Mouse Photos
Even with the best in-camera efforts, most mouse photos need a little digital help to look their absolute best. Post-processing is not about creating a fake image, but about revealing the true character and details that were hidden by imperfect lighting. I see it as the final, crucial step in mouse photography.
- Exposure and Shadow Recovery: Gently increase the ‘Shadows’ and ‘Blacks’ sliders to reveal detail in dark fur. Slightly decrease ‘Highlights’ if any white fur is looking too bright and washed out.
- White Balance Correction: Use the eyedropper tool to click on something that should be a neutral white or gray in the photo, like the clean bedding. This instantly neutralizes any weird color casts.
- Clarity and Texture: A subtle increase in the ‘Texture’ slider can enhance the fine details of their fur and whiskers without making the image look overly sharpened or artificial.
- Noise Reduction: If you used a high ISO, apply some ‘Luminance’ noise reduction to smooth out grain, but be careful not to overdo it and lose the delicate texture of their fur.
Frequently Asked Questions
What are small animal lights?
Small animal lights refer to specialized lighting equipment designed for photographing tiny pets like mice, focusing on gentle, diffused illumination that highlights their delicate features without causing stress or harsh shadows. These lights are typically soft and adjustable, such as LED panels or continuous sources, to ensure comfort and safety while capturing clear, vibrant images in a home setting.
What is a small animal lamp?
A small animal lamp is a compact, often dimmable light source, like a desk lamp or mini LED light, used to provide controlled illumination for photographing pets such as mice. It is designed to be cool-running and easy to position, allowing photographers to avoid startling their subjects while achieving even lighting that enhances fur texture and expressions without overheating the environment.
What are small animal lamp shades?
Small animal lamp shades are accessories that attach to light sources to soften and diffuse the output, reducing glare and harsh shadows in photos of tiny pets like mice. They can include professional softboxes or DIY solutions, such as fabric covers, that spread light evenly to create a flattering, natural-looking glow ideal for capturing detailed portraits without overwhelming the animal.
Your Photography Journey Begins Now
The most profound mouse portraits often come from simple, soft light and a great deal of patience. Focus on harnessing natural window light or a gentle, diffused lamp to avoid startling your tiny subjects, and always prioritize their comfort over getting the perfect shot. When photographing pet mice, work at their eye level and use a fast lens or higher ISO so you can shoot without flash. Let them explore familiar surroundings and use quiet encouragement or treats to capture natural expressions.
With these techniques, you’re equipped to capture the unique spirit and fleeting, beautiful moments of your mouse’s life. In my years of caring for my own boys, the photos taken with thoughtful lighting have become my most treasured keepsakes, a vibrant visual diary of their distinct personalities.
Further Reading & Sources
- Tips to set up lighting for pet photography at home and studio – COLBOR
- 7 Best Pet Photography Lighting Setups With One Light & Tips
- Advanced Pet Photography Tips
Isabella is a passionate small pet enthusiast with over 8 years of experience in caring for mice. She loves sharing practical tips and heartfelt stories to help fellow mouse owners provide the best care for their tiny companions.
Mice in Culture & Media