Nail Trimming Made Simple: Your Guide to Safe Tools and Techniques
Does the thought of trimming your pet’s nails make you nervous, fearing a slip could lead to pain or bleeding? I’ve been there, especially with my own mice like Kenny and Gregory, where a steady hand is everything-this guide draws from that hands-on experience to turn your anxiety into assurance, offering clear, practical steps for a stress-free process.
You’ll find everything needed to approach nail care with confidence: we will explore various nail trimming tools suited for different pets, outline essential safety tips to prevent accidents, and provide a straightforward method to keep trimming sessions calm and effective.
Why Mouse Nail Trimming Matters for Your Pet’s Health
Let’s be honest, a mouse’s tiny nails are easy to overlook. Regular nail care is a fundamental part of preventing pain and mobility issues for your small friend. Those little claws are not just for show; they are constantly growing, much like our own.
When nails become too long, they can curl back into the delicate footpads. This inward curling can lead to painful sores, infections, and even make every step a struggle. I’ve seen how a simple overgrown nail can change a mouse’s entire demeanor, making them less active and more reclusive.
Overgrown nails also pose a significant snagging risk. A nail caught on fabric or cage mesh can tear painfully, a distressing and entirely preventable injury. Keeping nails at a proper length ensures your mouse can climb, explore, and burrow without discomfort or danger.
How to Know When Your Mouse Needs a Nail Trim
Mice are masters of hiding discomfort, so you must become a keen observer. A weekly visual check of your mouse’s feet is your first and best line of defense. Gently hold your mouse and take a quick look at those tiny toes. Watch for limping, swelling, redness, or reluctance to bear weight—these are signs your mouse may be in pain. Noting changes in movement or grooming will help you tell if the problem is getting worse.
- You hear a distinct click-click-click as they walk on a solid, smooth surface.
- They seem to have less grip when climbing their usual toys or cage bars.
- They are grooming their feet more frequently than usual.
- You notice a slight change in their gait, perhaps a little more hesitant.
My mouse, Jeffery, gets a little twitchy when his nails are too long, almost as if he can feel the extra length with every step. Paying attention to these subtle behavioral shifts is just as important as the visual inspection.
What Overgrown Mouse Nails Look Like
You’re looking for a distinct curve. Healthy mouse nails follow a gentle, almost straight path from the toe. They should not visibly curl back towards the foot.
- The nail tip forms a sharp hook or semicircle shape.
- You can see the nail extending well past the toe pad from a side view.
- The nail may appear to be growing sideways or at an odd angle.
- In severe cases, the nail tip may be pressing into the footpad, causing redness.
If you see any curve beginning to form, it’s time for a trim. Don’t wait for a full circle to develop, as that indicates the nail is already causing pressure and potential pain. A quick trim now saves a lot of trouble later.
Choosing the Right Nail Trimming Tools for Mice
Best Tool Types for Mouse Nails
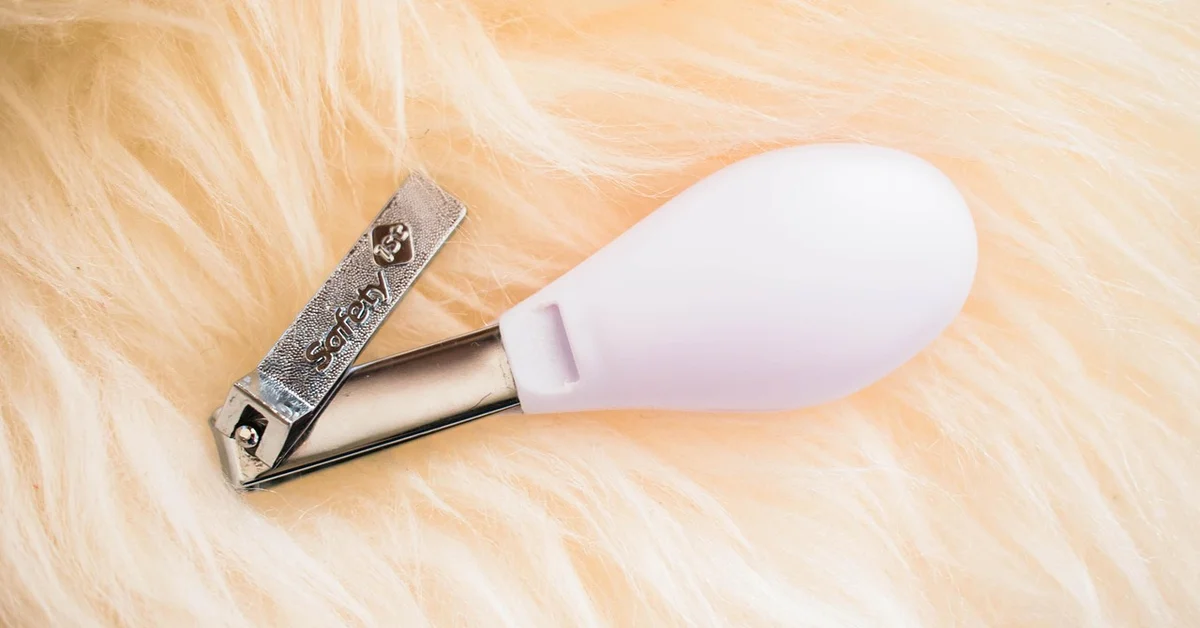
Selecting the proper tools makes nail care smoother for both you and your tiny friend. Human baby nail clippers or small animal-specific trimmers work best because their petite size offers precise control without overwhelming your mouse. I always reach for curved-edge clippers, as they reduce the risk of pinching and provide a cleaner cut. If your mouse is stressed or unwell it may over-groom or stop grooming, which affects nail condition and can make trimming trickier. Watch for changes in grooming and handle them gently to reduce anxiety during nail care.
- Baby nail clippers: Ideal for their gentle grip and sharp, small blades.
- Emery boards or fine-grit nail files: Perfect for mice who startle easily, like my Jeffery, allowing gradual filing without sudden movements.
- Guillotine-style small pet clippers: Useful if you’re experienced, but they require a steady hand to avoid mistakes.
Avoid standard human clippers or scissors, which can crush delicate nails and cause stress. Testing tools on a piece of paper first helps you gauge the pressure needed for a clean snip.
Tool Maintenance and Hygiene
Keeping your tools clean prevents infections and ensures they last longer. Wipe blades with rubbing alcohol before and after each use to eliminate bacteria that could harm your mouse. I make it a habit to disinfect my clippers weekly, especially since Gregory’s calm nature means he tolerates trims well, but hygiene is non-negotiable.
- Store tools in a dry, clean container to avoid rust and contamination.
- Sharpen blades regularly to maintain a smooth cutting edge-dull tools can splinter nails.
- Replace files or emery boards every few months, as worn surfaces become less effective.
Simple care routines protect your mouse from minor cuts turning into bigger issues. Dedicate a small kit just for nail trimming to keep everything organized and sanitary. Make nail checks part of your daily mouse care checklist. Here are five quick tips to keep your routine simple and consistent.
Step-by-Step: How to Trim Your Mouse’s Nails Safely
How to Hold Your Mouse During Trimming
Proper handling keeps your mouse secure and reduces wiggling. Cup your mouse gently in your non-dominant hand, supporting their body fully to mimic the comfort of being nestled in bedding. For energetic mice like Kenny, I lightly wrap them in a soft cloth, leaving one paw exposed at a time.
- Sit in a well-lit, quiet area to minimize distractions.
- Hold your mouse with their back against your palm and their feet facing upward.
- Use your fingers to steady the paw you’re trimming, applying minimal pressure.
If your mouse struggles, take breaks-forcing it can lead to bites or escapes. Patience is key; even a few nails per session is progress.
Where to Cut: Avoiding the Quick
Knowing where to cut prevents pain and bleeding. The quick is the pinkish vein inside the nail, visible in lighter-colored mice, and cutting into it causes discomfort and bleeding. Aim for the transparent tip, just beyond where the nail starts to curve.
- For clear nails, trim where the white section meets the pink-this is the safe zone.
- With dark nails, shine a flashlight underneath to highlight the quick’s shadow.
- Make small, angled cuts to avoid splintering and reduce the chance of nicking the quick.
Practice on a calm mouse first to build confidence. Trimming too little is better than risking injury, as nails can be shortened gradually over time. Follow a brief guide to trimming mouse nails to learn how to hold the paw and spot the quick. Start slowly and stop if the mouse shows signs of stress.
Safety First: Preventing Injuries During Nail Trims
What to Do If You Cut the Quick
Accidents happen, but quick action can ease the situation. Apply styptic powder or a dab of cornstarch to the nail tip to stop bleeding almost instantly. I keep these supplies handy because even experienced owners can slip up.
- Remain calm-your mouse will sense your anxiety and become more stressed.
- Gently press the powder onto the nail for 30-60 seconds until bleeding ceases.
- Offer a treat and comfort your mouse to reassure them, like I do with Jeffery, who perks up with a berry crumb.
Monitor the nail for signs of infection, such as swelling or redness. Most minor cuts heal quickly with proper care, so don’t let one mistake deter you from future trims.
Keeping Your Mouse Calm and Comfortable
A relaxed mouse makes trimming easier and safer. Incorporate positive reinforcement by giving a favorite treat, like sunflower seeds for Kenny, before and after each paw. Familiar scents and sounds help, so trim in their usual play area.
- Speak in a soft, steady voice to soothe nerves-mice respond to tone.
- Schedule trims after playtime when your mouse is naturally more tired and less fidgety.
- Use short, 5-minute sessions to avoid overwhelming them, especially for younger or anxious mice.
Building trust over time turns nail care into a routine, not a struggle. Your mouse will learn to associate trims with rewards, making the process smoother for everyone involved. Gentle, consistent grooming sessions become moments of bonding and care. Over time this reinforces trust, so trims feel safe rather than stressful.
Common Mouse Nail Trimming Problems and Solutions
Even with the best intentions, nail trimming can present some challenges. Recognizing these common issues ahead of time prepares you to handle them calmly and effectively. Avoiding common grooming mistakes—like cutting too close, using dull tools, or rushing—reduces stress and the risk of injury. Read on for the key grooming don’ts to avoid when trimming nails.
When to Seek Professional Help
While many situations are manageable at home, some signs clearly indicate it’s time to call a vet. You should always seek professional help if you accidentally cut into the quick and the bleeding does not stop within a few minutes. Other red flags include any sign of infection, like redness, swelling, or pus around the nail bed. If your mouse is in obvious, persistent pain, limping, or refusing to put weight on a foot after a trim, a vet visit is the safest course of action. It’s always better to be cautious with such small, delicate creatures.
Squirming and Stress
Many mice, like my energetic Kenny, simply won’t sit still. Their natural instinct is to flee, not to have their paws handled. But when kept in barren environments, [some mice develop learned helplessness](https://measlymouse.fyi/learned-helplessness-mice-barren-environment), becoming unusually passive and failing to escape stressful situations. This shows how housing conditions can profoundly alter a mouse’s behavior.
- Try the “burrito method” by gently wrapping your mouse in a small, soft cloth, exposing only one paw at a time.
- Trim nails right after they’ve woken up and are still a bit sleepy and calm.
- Offer a high-value treat distraction, like a dab of yogurt or banana, for a companion to feed them while you work.
Overgrown or Curled Nails
If nails have been left too long, they can start to curl and become difficult to trim with standard clippers.
- Do not attempt to cut off the large curl in one go. This is extremely risky.
- Instead, make several tiny clips over a few days, taking off just the very tip each time to encourage the quick to recede gradually.
- For severely curled nails that are embedding into the footpad, this is a definite job for a veterinarian.
Dark or Black Nails
Mice with dark fur, like my Gregory, often have dark nails where the quick is impossible to see.
- Use a bright light from behind or below the nail; sometimes you can see the quick’s shadow.
- Only trim the sharp, translucent tip of the nail, taking off the absolute minimum.
- Filing is a much safer option for dark nails, as it removes length slowly and with less risk of hitting the quick.
Maintaining Healthy Mouse Nails Between Trims
The goal is to minimize how often you need to bring out the clippers. Providing a textured environment is the single most effective way to keep nails naturally filed down.
Essential Cage Textures
Think of your mouse’s habitat as a giant, all-natural nail file. Incorporate a variety of surfaces for them to scurry across. Mice often scratch walls to wear down their claws and to leave scent marks, so providing ropes, wood blocks, and cardboard gives them appropriate outlets for that behavior. Redirecting scratching this way helps protect your walls and keeps your pet’s instincts satisfied.
- Unglazed Ceramic Tiles: Place a few in high-traffic areas like under water bottles or food dishes.
- Rough Stone or Bricks: A small, clean paver makes an excellent climbing and scratching spot.
- Wooden Climbing Branches: Opt for branches with bark still attached, as the rough texture is perfect for wearing down nails.
- Rope Toys and Ladders: The fibrous texture of sisal or hemp rope provides consistent abrasion.
Strategic Toy Placement
It’s not just what you put in the cage, but where you put it. Positioning textured items near essential resources encourages constant, natural nail maintenance throughout the day. Place a ceramic tile leading up to the food bowl, or ensure the only way to reach a favorite hammock is by climbing a rough wooden branch. This turns necessary daily activities into mini manicure sessions.
Regular Substrate Checks
The bedding you use can also play a role. While soft paper bedding is comfortable, it doesn’t offer much resistance. I’ve found that a mixed substrate approach works wonders-a deep, soft area for nesting combined with a separate digging box filled with a more compact, fibrous material like coconut coir. This variety ensures their nails encounter different levels of friction as they go about their natural behaviors.
Frequently Asked Questions
How can I put safety first when using nail clippers?
Putting safety first begins with thorough preparation before each trim. Always inspect your clippers for any signs of damage, such as rust or dull blades, and ensure they are the appropriate size for your mouse’s delicate nails to avoid crushing or splintering. Work in a secure, quiet space where your mouse feels safe, and keep styptic powder or cornstarch within reach to quickly address any accidental nicks, ensuring a stress-free experience for both of you.
How can I use nail clippers safely?
Using clippers safely involves mastering the right technique to minimize risks. Hold the clippers firmly but gently, positioning them perpendicular to the nail for a clean cut, and only trim the transparent tip to avoid the sensitive quick. Support your mouse’s paw with a steady hand and proceed with small, incremental clips, pausing if your mouse shows any signs of distress to prevent sudden movements that could lead to injury. Before trimming, be sure you can safely pick up and hold your mouse—support its body and avoid squeezing—and keep your movements calm and confident to reduce stress during the process.
How does a nail clippers safety lock work?
A safety lock on nail clippers is a built-in feature designed to prevent accidental closure when not in active use. It usually consists of a small lever or sliding mechanism that, when engaged, holds the blades in an open position, reducing the risk of cuts during handling or storage. While many small animal clippers may not include this feature, if yours does, always activate the lock after cleaning and before storing to keep your tools safe and ready for the next trim.
Your Confident Journey Forward
With the right tools and a gentle approach, you’re fully prepared to handle your mouse’s nail care. Remember that patience and positive reinforcement will build a foundation of trust that makes every session smoother. These same techniques are essential when preparing a mouse for shows, grooming, and taming. Short, calm handling sessions and gentle desensitization will help your mouse stay relaxed during grooming and inspections.
This small act of care is a profound way to ensure your mouse’s comfort and health. You’ll soon find a quiet rhythm in this routine, a special moment that deepens the unique bond you share with your tiny companion. From my own experience with my curious crew, the reward is seeing your happy, comfortable mouse exploring without a care.
Further Reading & Sources
- How to trim your nails
- How to Cut Your Nails Correctly According to Experts
- How to Clip Your Nails Like a Pro | GQ
Isabella is a passionate small pet enthusiast with over 8 years of experience in caring for mice. She loves sharing practical tips and heartfelt stories to help fellow mouse owners provide the best care for their tiny companions.
Mice Grooming